Killer Griller: Smoked & Barbecued Baby Back Ribs

baby back ribs smoking ribs city barbeque sauce

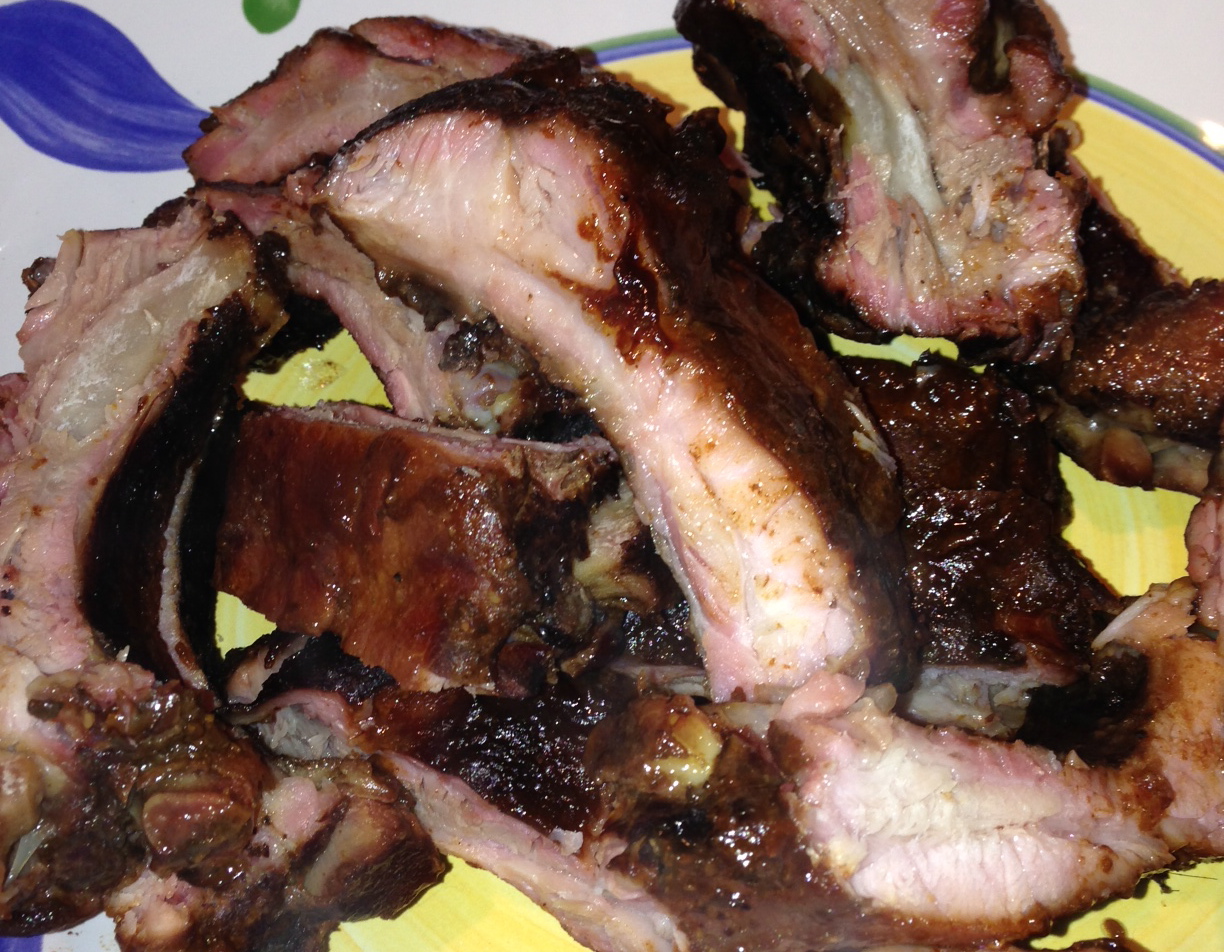
Finished Ribs with Smoke Ring (that’s the pink edge) and Sweet BBQ Sauce

New York is one of the biggest cities in the world…OK, like 38th, but that’s pretty big. Still, there are things you just can’t do here.

Like big meat grilling…I mean unless you have a big terrace, deck, back yard (ha!)…you just can’t outdoor grill. And, then there are those pesky laws about transporting gas tanks – like for a gas grill – through any of the tunnels or over any of the bridges. Uhm, this is an island, how am I supposed to transport my off-island bought gas tanks?

No worries…With any luck, we have all found friends and relatives with places outside of the city. In a perfect world, these generous people who open up their homes to us, have a grill. While I prefer a gas grill, no need to be picky…In many cases a charcoal grill is actually better.

On a recent trip to Cincinnati – remember, where my people live and cheerleaders date minors – I marveled as the grill master (aka, my brother) made some unbelievably good smoked and bbq baby back ribs using his old school charcoal Weber grill.

Tiny Apartment Tip: Make friends with homes off the island….

Hickory and Applewood Smoked Baby Back Ribs (serves 6)

Warning: This is an all day event….but, you’re in the country or at least out of the city, what else would you be doing?

Ingredients:

  • baby back ribs smoked barbeque kroger

    Kroger Baby Back Ribs – I think these were each over 3.25lbs – and very moist and tender

    2 giant packages of pork baby back ribs – 3.25 – 3.5 lbs each

  • city barbecue barbeque original sauce

    City Barbeque Original Sauce

    1 – 2 cups City Barbeque Original Barbeque Sauce

  • 2 TBSP Sea Salt
  • 2 TBSP Garlic Salt
  • 2 TBSP Garlic Powder
  • 2 TBSP Onion Powder
  • 1 TBSP Paprika
  • 2 Meat Injectors worth of Bacon Grease  – just go with it
  • A Bunch of Hickory Chips
  • A Bunch of Applewood Chips

1. In a large bucket or pot or bowl or whatever, combine the wood chips, cover with water and soak for at least 2 hours…

dinner baby back smoked barbeque ribs

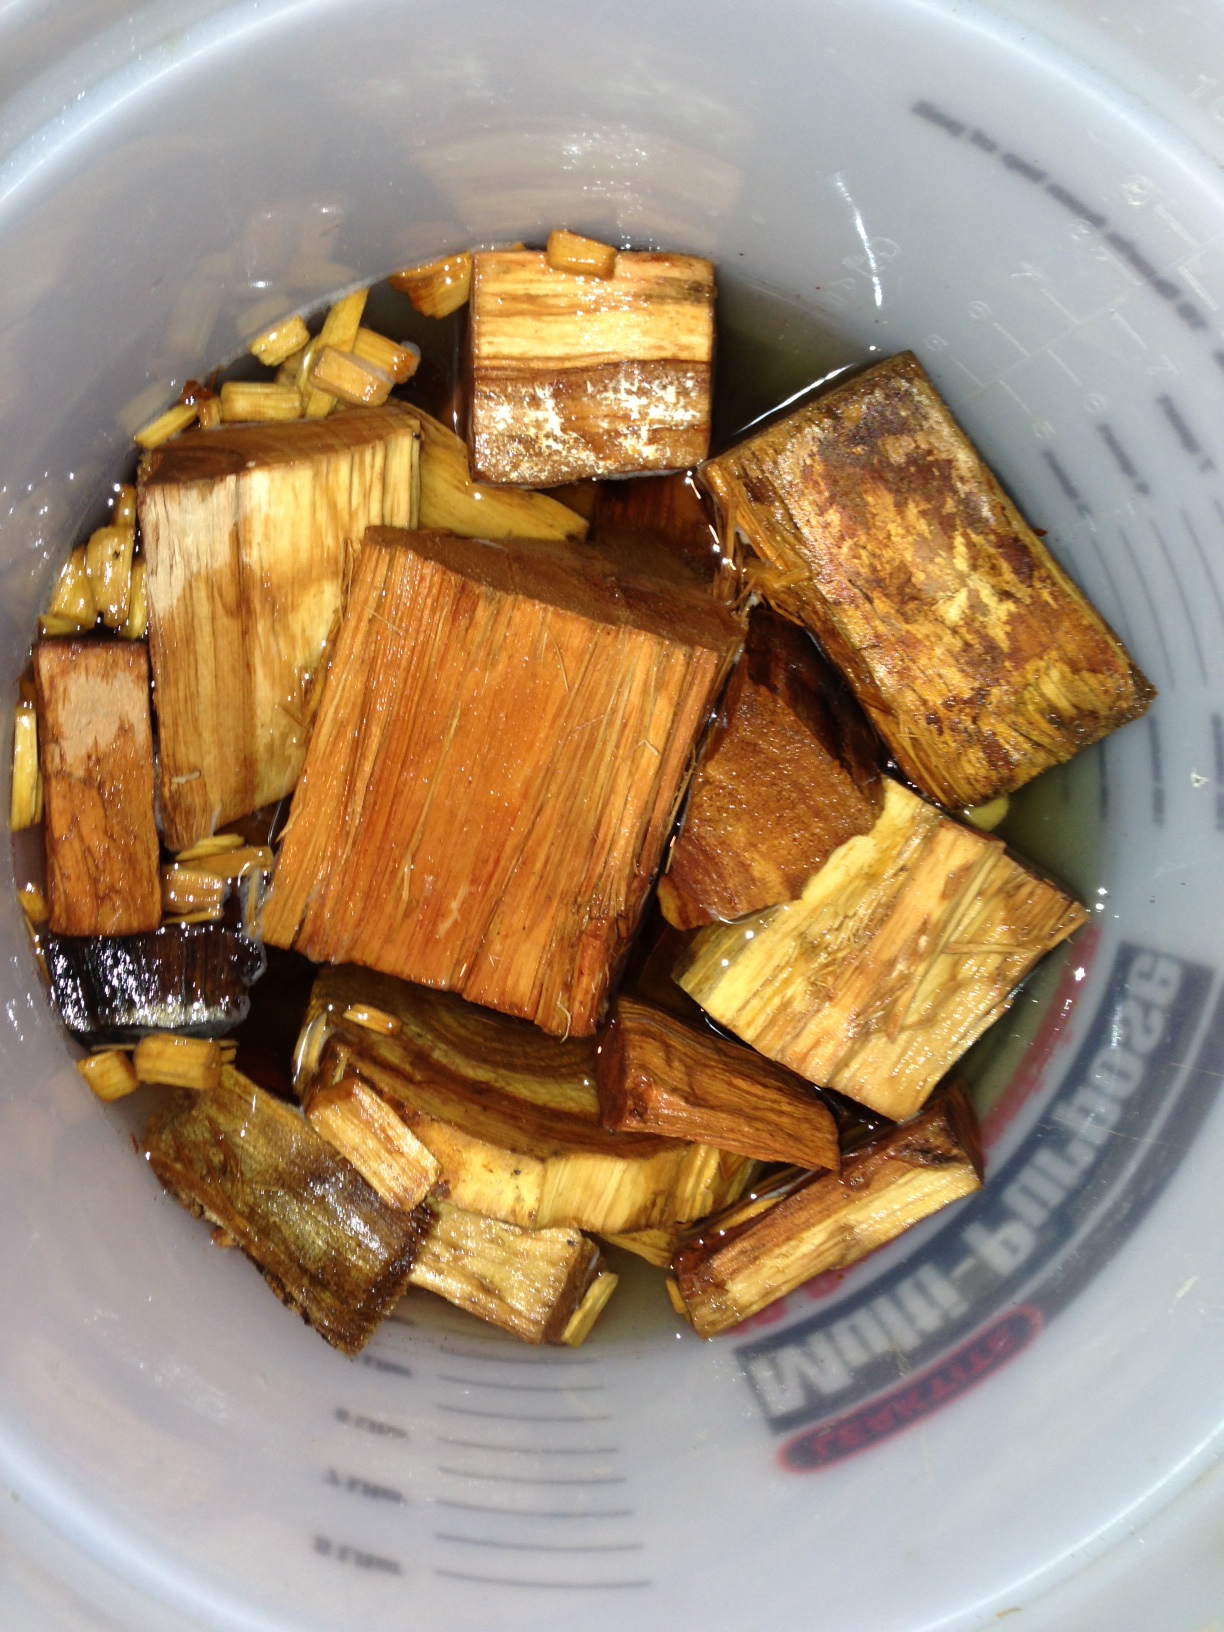
The Bucket Method for wood chip soaking

2. Remove the ribs from packaging and peel the membrane from the back side. This was a bit tricky because the membrane is slimy and tough to pull off…but, you can lift the edge of the membrane with a butter knife and then use a paper towel or rubber tongs to pull back the membrane

baby back ribs pull back membrane

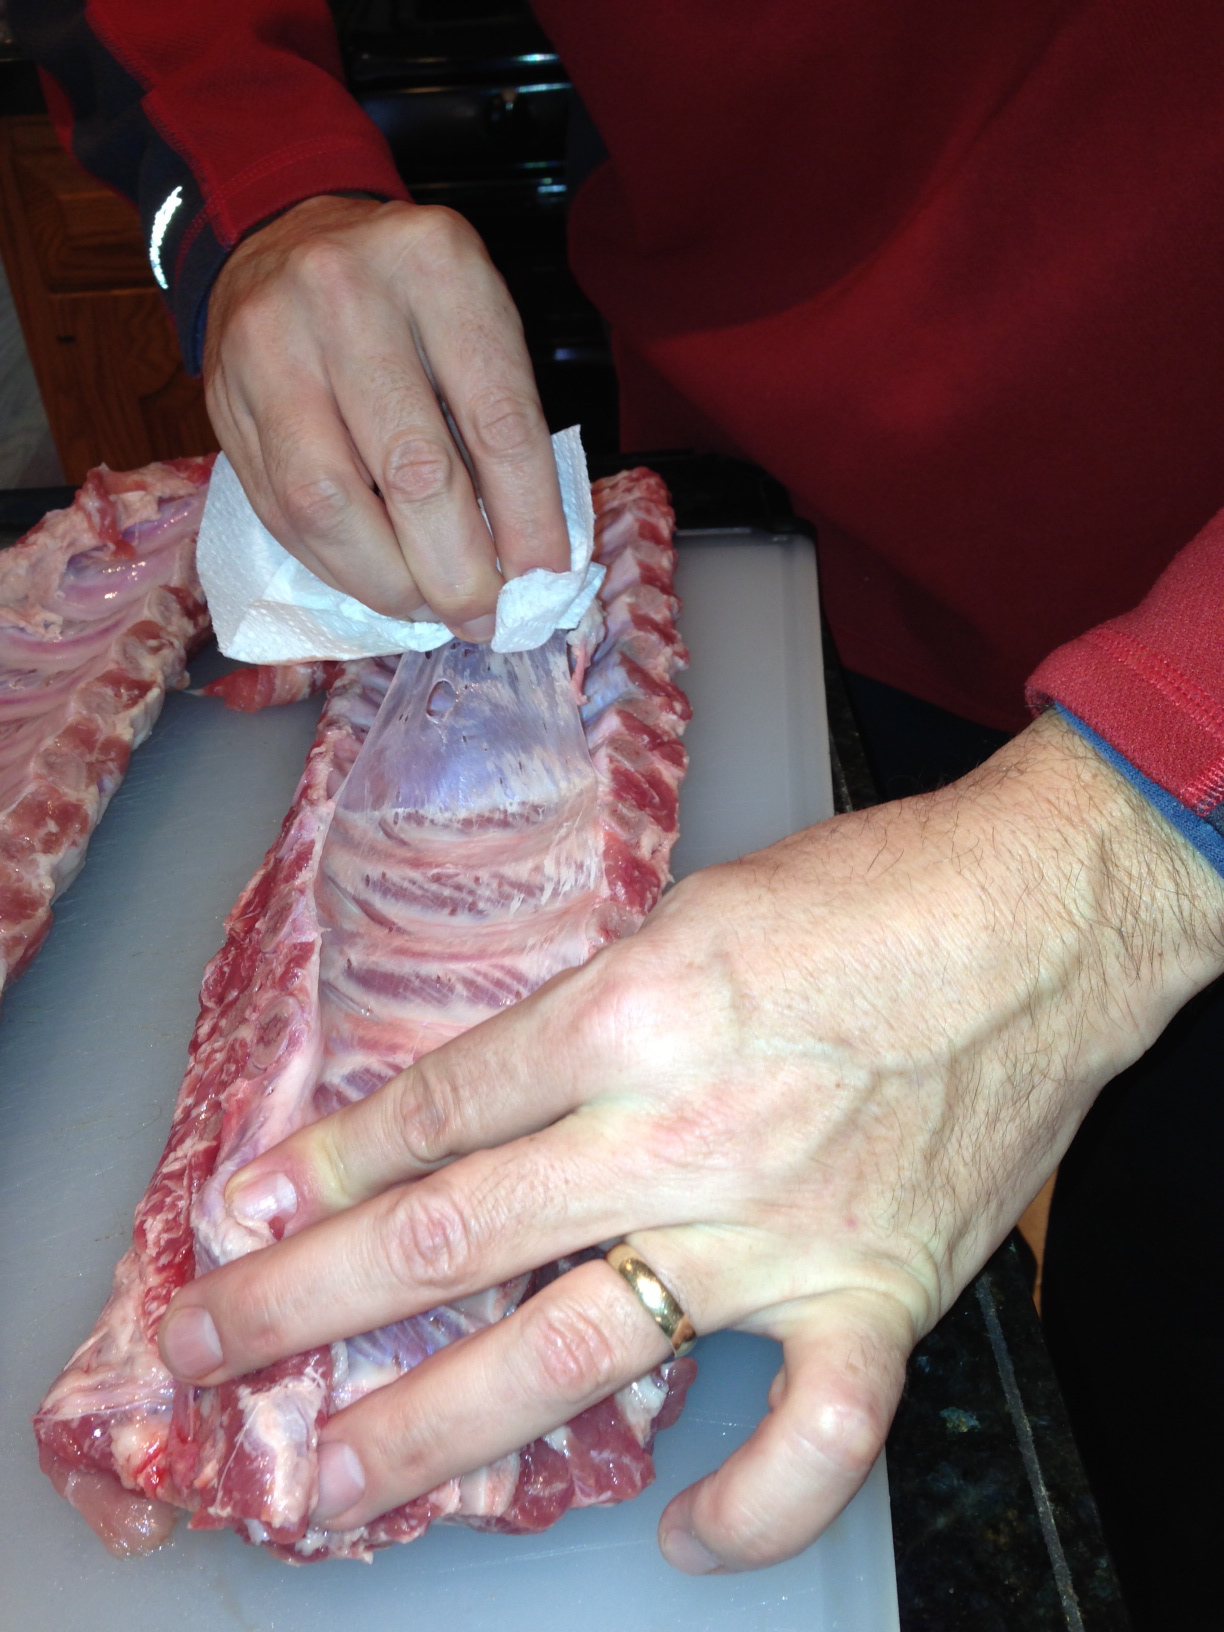
Paper Towel Pull Back Method

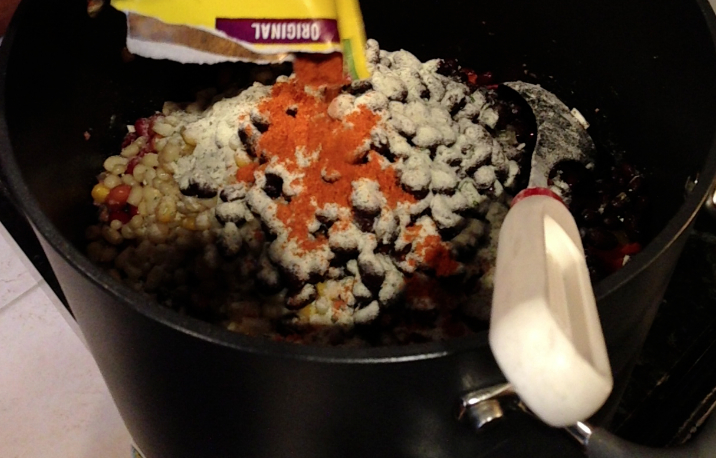
3. In a bowl, combine the Sea Salt, Garlic Salt, Garlic Powder, Paprika, Onion Powder. We also threw in some Hickory Flavor Rub…

4. Rub the meat on both sides generously with the spicy mixture – my anal retentive brother puts his hands in plastic baggies and then rubs…but you can also just use your bare hands and, omg, wash them after – your call

Smoked grilled barbeque baby back ribs

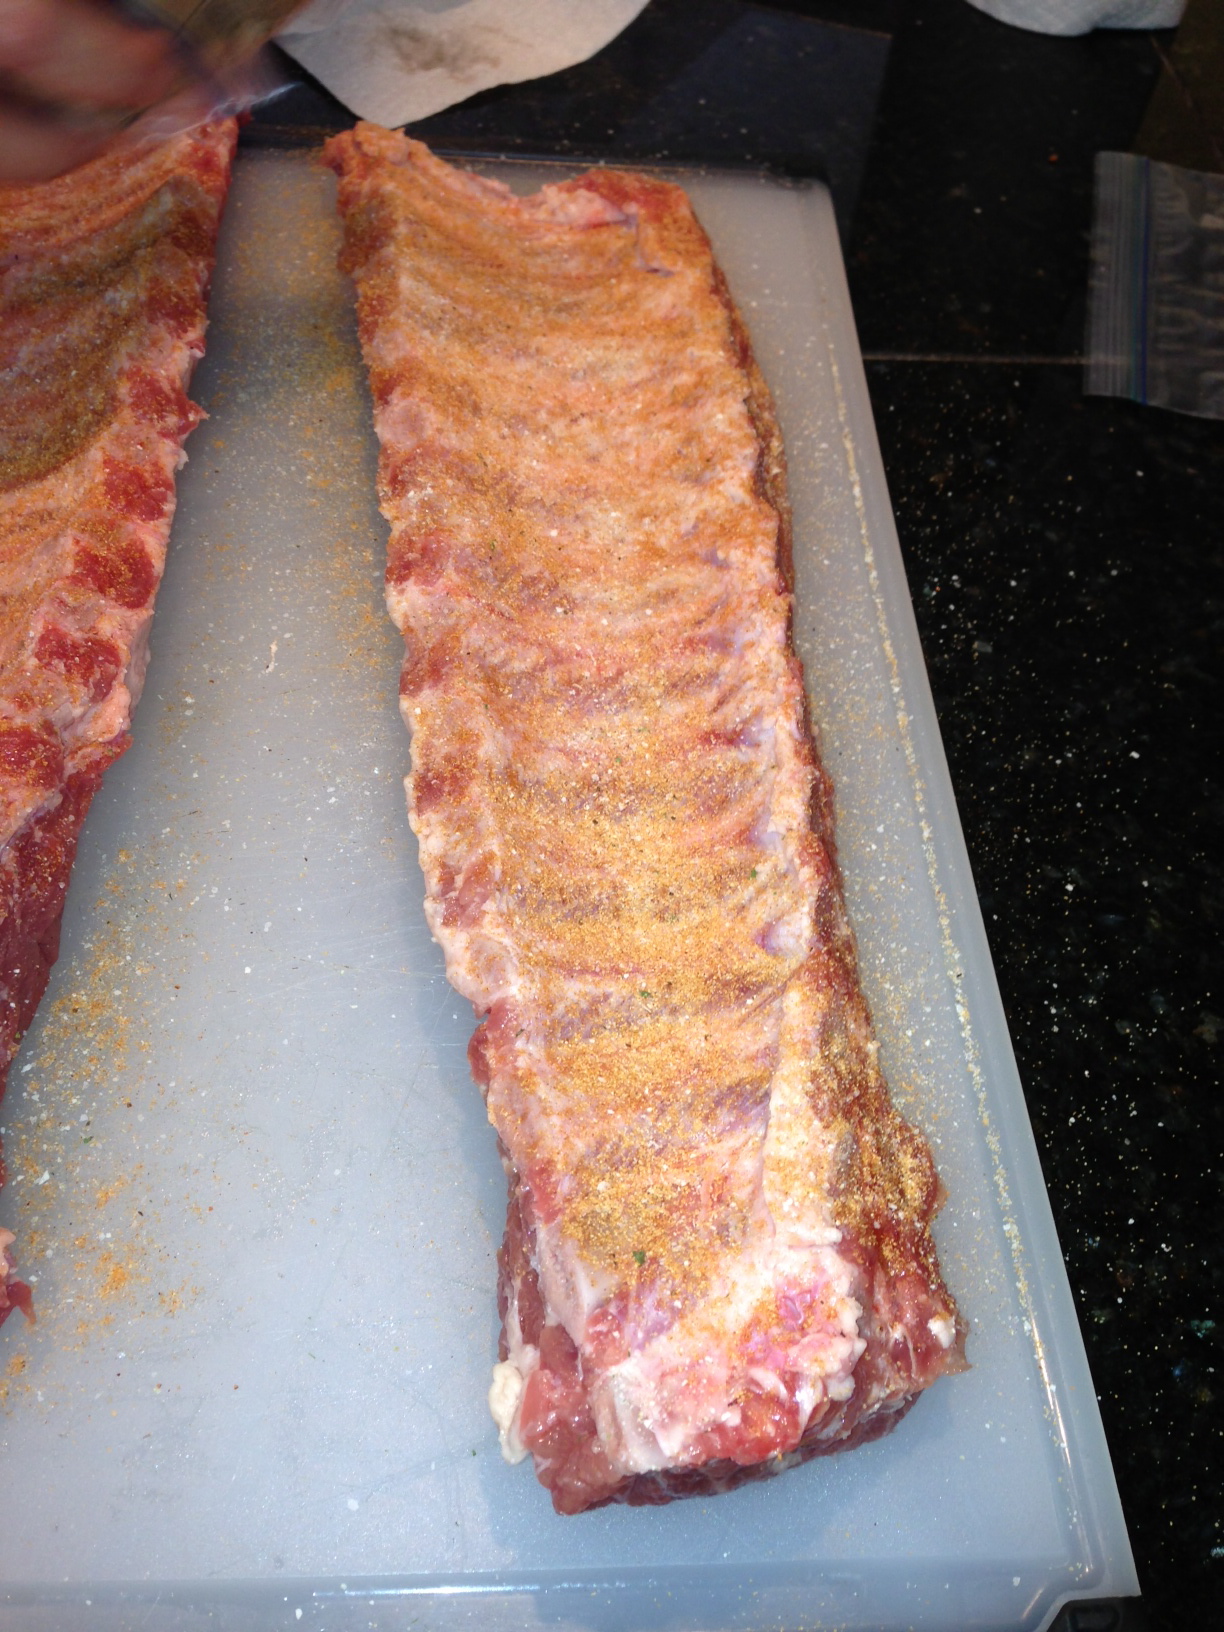
Generously Season both sides…

5. And, this is pretty OTT…but, whatever…Using your meat injector (a tool only found in Sweeney Todd’s or Hannibal Lector’s collection…or the home of teenage boys who like science and bacon) Inject each rib with a good squirt of bacon fat…Yeah, that’s right, we injected pork fat into pork ribs…

meat injector bbq ribs

OTT Meat Injection: Bacon Fat into Pork. Yeah, we did that.

6. Wrap the ribs tightly in tin foil and put in the fridge – ideally overnight – but, at least 3 hours

dinner barbecue smoked baby back ribs

Wrap the Ribs tightly in Reynold’s Wrap

7. After the overnight dry rub fridging….Prepare your grill – this is a charcoal grill only event:

smoked barbecue barbeque baby back ribs

Indirect Heat…And, snow. Grilling knows no season (see no charcoal or wood chips in the middle)

  • Set the grill for indirect heat – that means the center of the grill basin doesn’t have any charcoal in it…but, instead, the charcoal is in two piles – one on either side of the grill basin. My brother used bricks to keep the charcoal piles contained to the side of the grill – he’s smart like that.
  • Get the charcoal going, then cover the charcoal with the wood chips and replace the grate
  • Cover the grill…and, yes, it’s going to smoke…a lot…that’s the point

8. Prepare your ribs for the smoking process…In my brother’s case this meant:

smoked bbq baby back ribs tools

Murderously Fabulous Grill Gloves and Rib Rack

  • Don some murderous looking grill gloves….these are like totally jacked up kitchen gloves – specifically designed to withstand great heat
  • Spray a rib rack (again, not a city accoutrement, but apparently quite the rage off the island) with non stick cooking spray
  • Place each rib in its own rack slot
  • Using a large skewer (preferably a wooden one that you’ve soaked for at least :30mins) pierce through the ends of each rack to elevate them
barbecue barbeque rib rack

Racked and Elevated Baby Back Ribs Smoker Ready (not murderous gloves)

9. Place the racked ribs on the grill and cover. Cook for 2 – 2.5 hours

baby back ribs in weber grill smoking

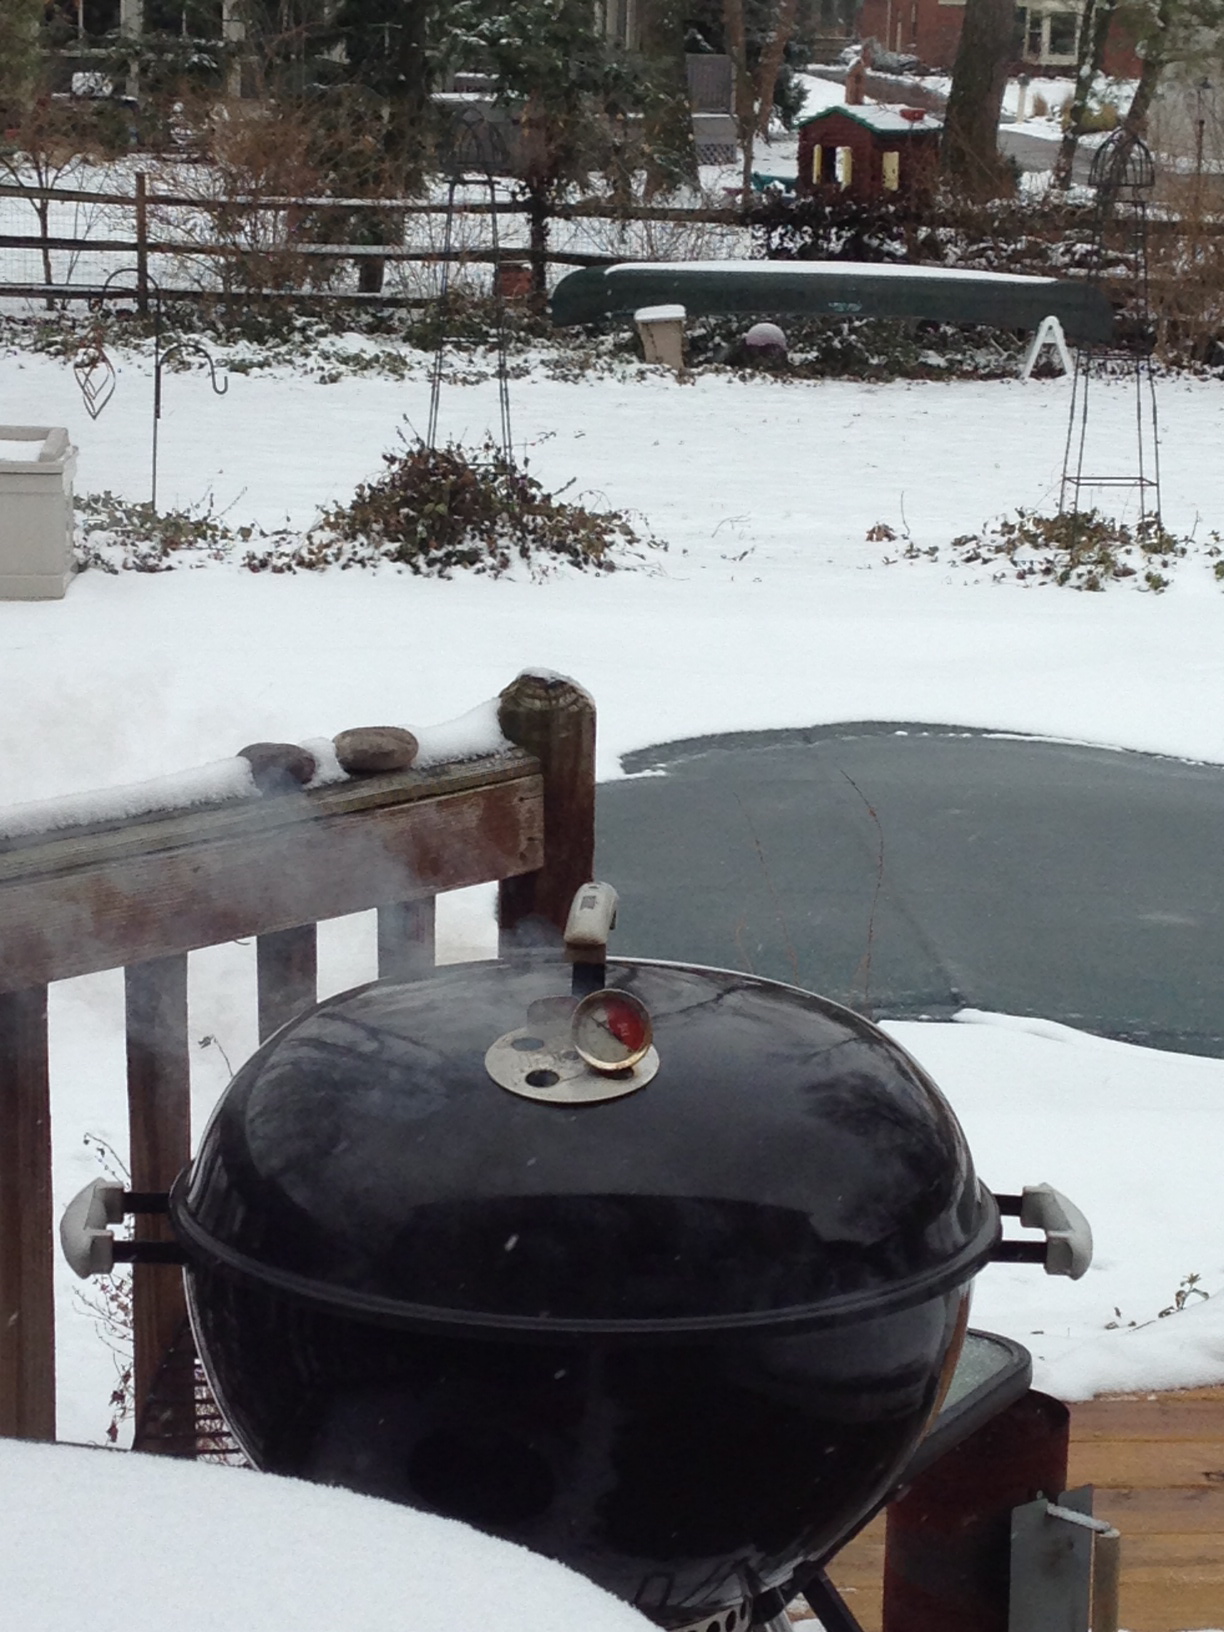
Smoker in the Snow…Ribs Racked and inside

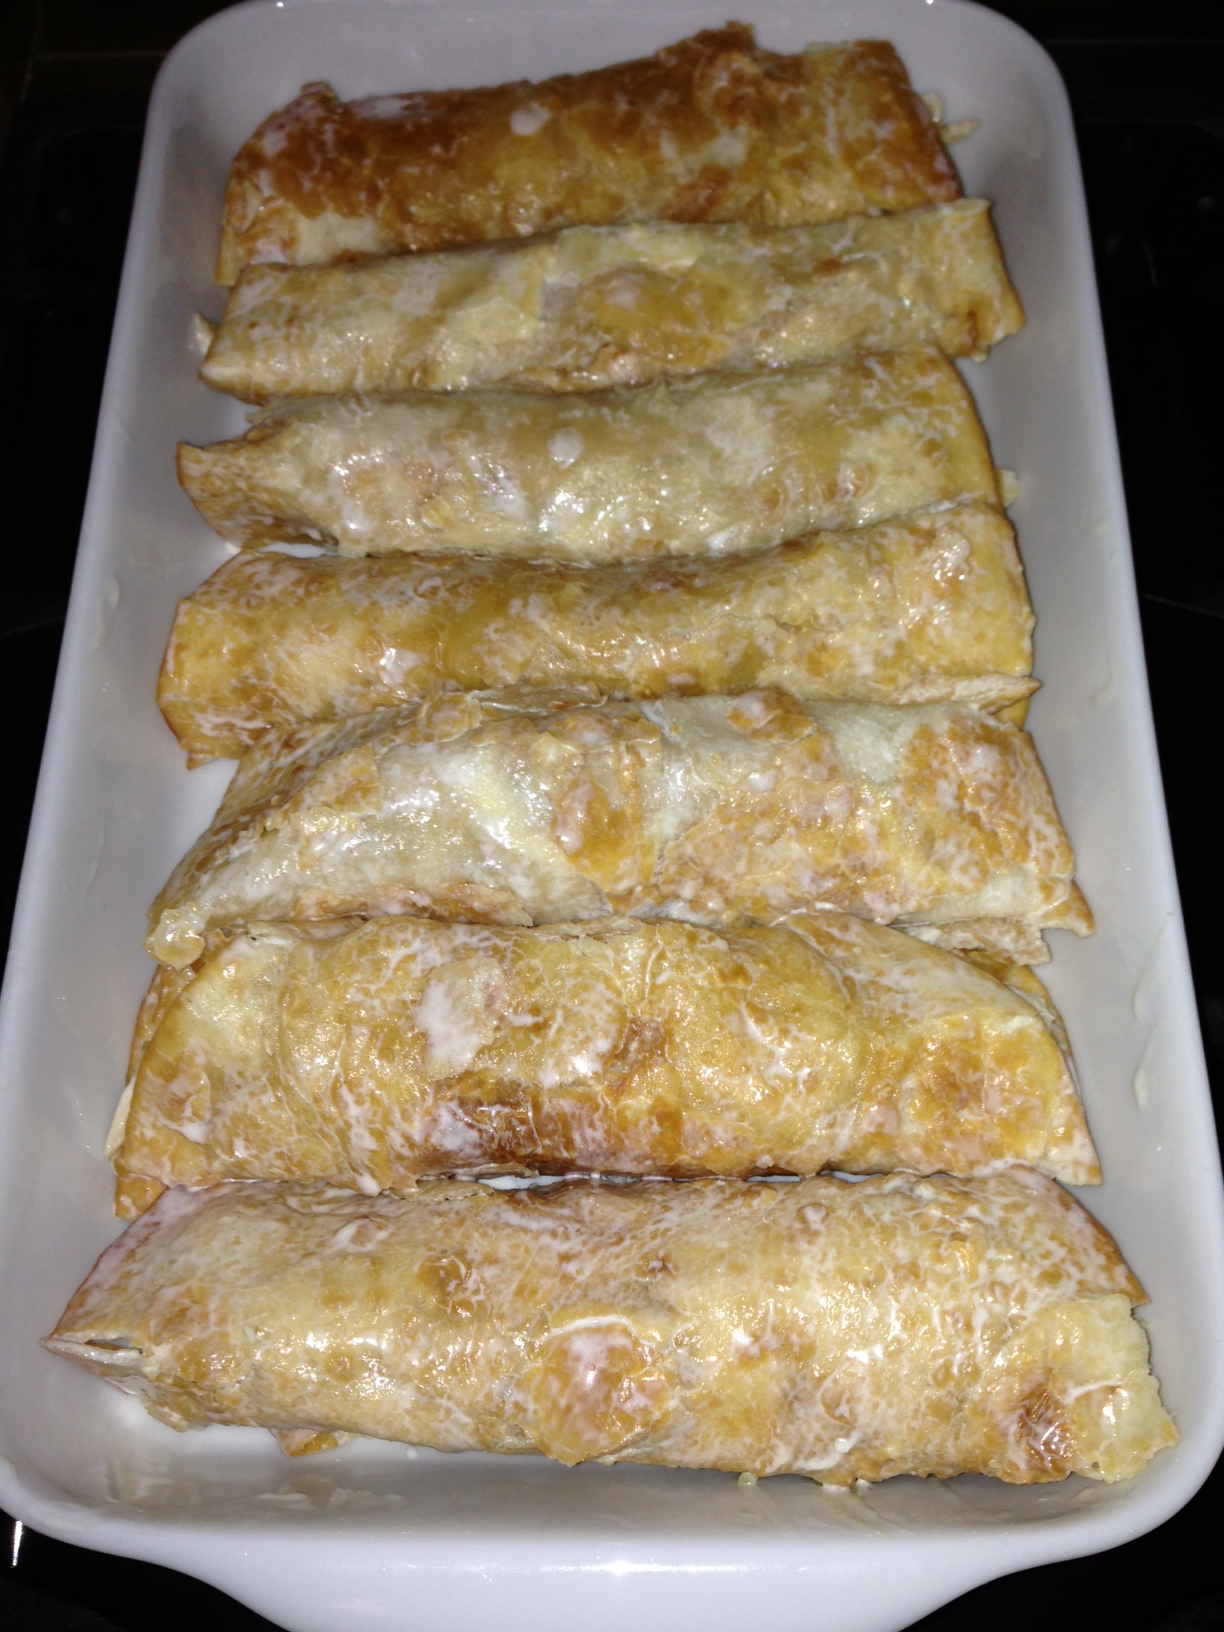
10. Remove the ribs from the rib rack and place in a large, high sided pan. Preferably a tin foil one you can pitch afterwards…

11. Generously cover the ribs with Barbeque/Barbecue sauce – we used City Barbeque Original Sauce…pretty good

City Barbeque original sauce baby back ribs

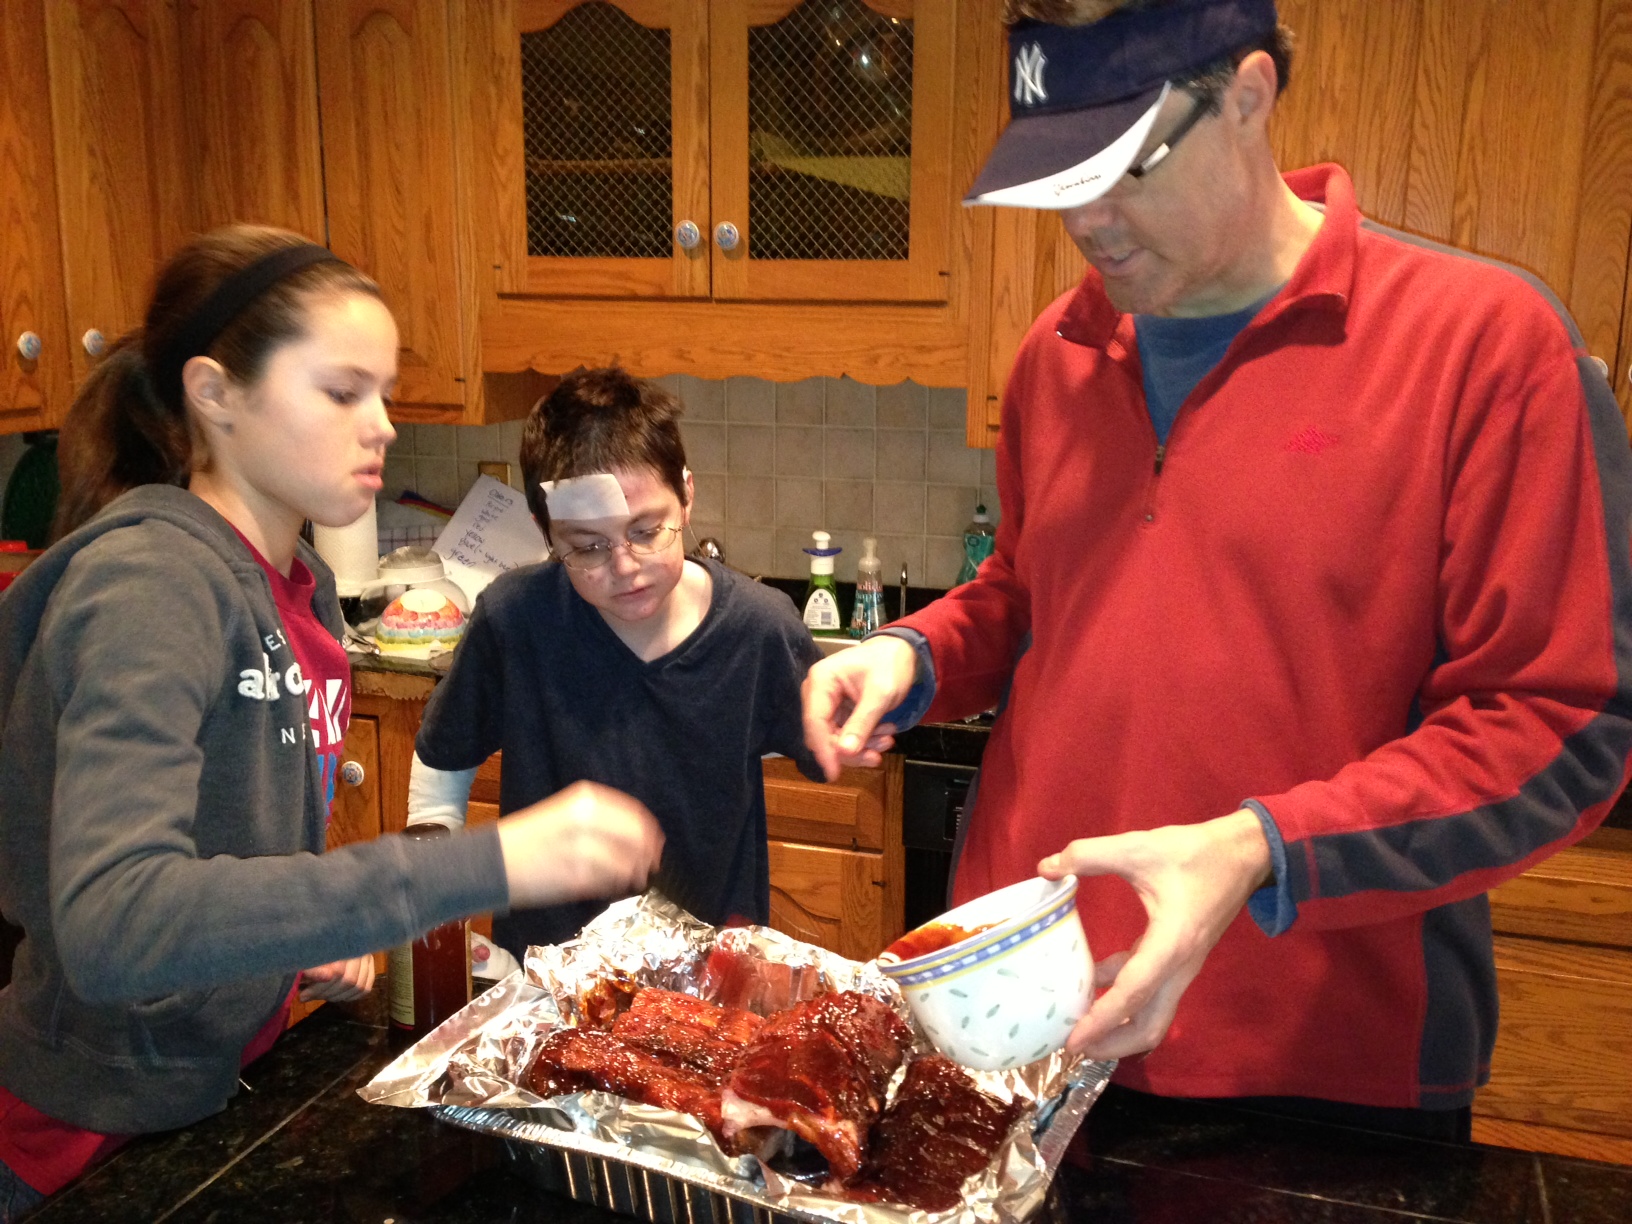
BBQ Saucification of the Ribs. A family affair.

12. Preheat oven to 250 degrees

13. Cover the ribs with tin foil and put in the oven for 2 hours

14. After the low baking process…remove the ribs from the oven and from the pan…BUT, don’t eat yet! Nope, put the ribs on a cutting board and cover with tin foil for up to an hour to give the meat a chance to rest and re-juicify
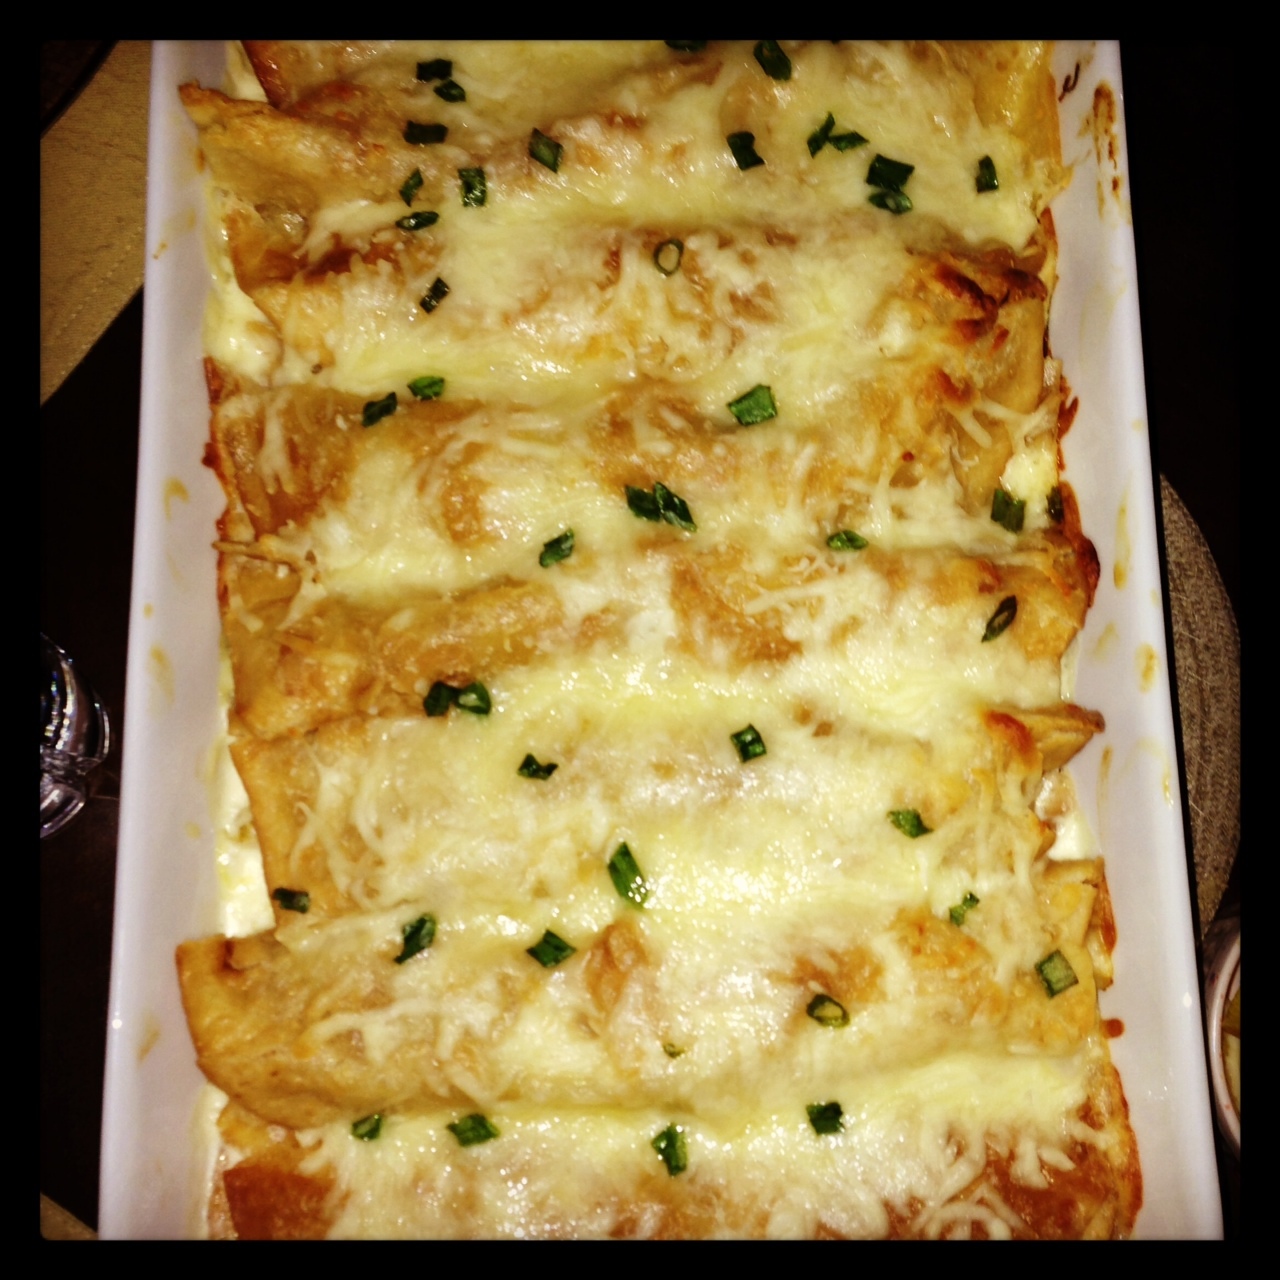
15. Slice and serve

baby back smoked bbq pork ribs sliced

At Last….Slicified and Ready to Serve

The ribs were fall off the bone amazingly smoky, sweet and fabulous. Took all day…but, more than well worth it.

If you’re lucky enough to guest at the home of a Killer Griller…try this.

My brother and I have always been pretty competitive with one another – it’s a gene, I think. And, let’s just be honest, I’m the much better cook. That said…my brother is a Killer Griller.

I’m Keeping the Table: Two Meat Lasagna

dinner party table setting lasagna 365 brand

Dinner Table Set and Ready. And yes, that’s my recycling in the background.

When I first moved to NYC, people had dinner parties. Sure, we were young and couldn’t really cook so the food fare was far from fabulous. Sometimes it was even sorta gross. But, we had dinner parties anyway. It was a big deal…acting all grown up and stuff.

I love a good dinner party…but, no one seems to have them any more. Much more a rarity than the norm. Maybe it’s because our apartments are small and a lot of us just don’t have the space for a sit down dinner.

It’s true…space is at a premium in NYC and sometimes difficult decisions must be made when choosing how best to maximize the limited space. I mean, when I moved from my house to this apartment…I gave away, yes gave away, about 2/3 of my kitchen stuff…When confronted with the choice between giving up some of my shoes or storing a second Le Creuset 6 qt pot…You know what won out.

Everyone told me my dining room table would be too big for this apartment. It’s true. The table is enormous. Even without the extensions that live in a lovely climate controlled storage space in CT, I can easily seat 8.

blizzard 2013 on tv

Nemo!

So, because I cook AND I have a proper dining table in the ‘dining area’ of my apartment, I host dinner parties. And, there’s no better excuse for a dinner party than a good old fashioned snowstorm.

Last night the posse rallied chez moi to ride out Nemo – the Blizzard of 2013. For storms, I tend to make comfort food. Good, crowd pleasing, stick to your ribs, comfort food. And, last night was no exception.

Lasagna (Serves 8)

Small apartment tip: If at all possible, have a dining area in your tiny space.

Ingredients:

  • 1 box Barilla brand no-cook lasagna sheets – you only need 1 box, but get two as you’re bound to break at least one of the sheets. Trust me.
  • 1 – 1.25lbs of ground beef – I used 93/7 because it was on sale at Whole Foods
  • 2 sweet Italian pork sausages…OK, they didn’t have any yesterday, so I bought some awesome Pork Broccoli Rabe sausages
  • Whole Foods 365 brand ricotta cheese

    365 Brand

    1 1/2 Cups of whole milk ricotta cheese…normally I am a Poly-O loyalist…but, WF has its own brand and I was trying to avoid a 2 grocery store day.

  • 1/2 Cup of grated Parmesan Cheese
  • 3 24oz jars of Sauce…I use a combination of 2 parts marinara sauce + 1 part vodka sauce. Note the 365 Organic Marinara sauce is a 25oz jar…that was AOK. And, you don’t really need all three jars…but you need more than 1 jar of the marinara. And extra sauce for leftovers is good.
  • 1 1/2 cups of shredded or grated good mozzarella cheese
  • McCormick’s or similar Italian Seasoning
  • Olive Oil

Preheat Oven to 375 degrees

1. In a large saute pan (mine is a 3 qt non-stick All-Clad one) heat about 2 TBSP of olive oil over medium heat

2. Remove the sausage from casing and break into pieces and drop into the heated olive oil

browning sausage lasagna recipe dinner

Brown don’t burn the sausage

3. Cook the sausage completely….Then remove from the saute pan and set aside

4. Add the ground beef to the pan and brown

browning beef for lasagna 365 brand

Use a wooden spoon to break up the beef

5. Drain the excess oil from the pan and then re-add the browned sausage to the browned beef

beef and sausage lasagna recipe

Because 2 meats are better than 1

6. Sprinkle about 1 TBSP of Italian Seasoning over the meat/sausage. If you don’t have Italian spice (horrors!) just use a combination of dried oregano, thyme, rosemary, sage, basil. Whatever feels Italian-y.

7. Pour in 1 complete jar of marinara sauce and about 1/2 C of the vodka sauce over the meat

365 sauce lasagna beef pork recipe

Dump in and Stir to Combine

8. Stir to combine and then simmer on low for 5 minutes

9. In a small sauce pan, heat 2 cups of marinara sauce over low heat

10. In a bowl, combine the ricotta cheese with the parmesan

2 meat lasagna recipe 365 brand

365 brand ricotta and freshly grated parm

11. Layer up the Lasagna:

  • Coat the bottom of the lasagna pan with a layer of the marinara sauce heating in the small sauce pan 
  • barilla no cook lasagna sheets

    No Fuss

    Using a small spatula, spread the ricotta cheese-parm mixture on one side of 4 Barilla no cook lasagna sheets…Some cooks will tell you to soak the no cook sheets in warm water before using them, but you really don’t need to. So, don’t.

  • Place the cheesed lasagna sheets cheese side up onto the sauce layer
  • 365 brand ricotta lasagna beef

    365 Ricotta Schmear on Lasagna Sheets

  • Sprinkle about 1/4 Cup of mozzarella over the ricotta/parm lasagna sheets
  • Cover the cheese with 1/3 of the meaty sausage-y sauce
  • beef and sausage lasagna laying

    Cover with 1/3 of the Meaty Goodness

  • Repeat 2 more times
  • Cover the final meat layer with a layer of the no cook lasagna sheets
  • Using the remaining non-meat sauce, cover the entire lasagna – be generous. It’s the sauce that will heat and steam to cook the no-cook lasagna sheets.
  • Sprinkle the remaining mozzarella cheese and about 2 TBSP of grated parm over the  lasagna

11. Cover the lasagna with tin foil and put into the oven for :45mins

12. Remove the tin foil and bake an additional :05 – :10 mins

13. Remove from the oven and let stand for :15mins. This is important….It will make the lasagna easier to cut into free standing servings

beef and pork sausage lasagna recipe

Let stand for :15mins before serving

Eat.

My table is too big for the apartment. I know that, I do. But, as long as people will still come to dinner, I’m keeping it. I might even go out and get two more chairs.

If Something Seems Simple, It Is Simple: Taco Soup

Taco Soup recipe el paso seasoning

Easiest Best Soup Ever

Before Super Storm Sandy hit, Chris Christie, New Jersey’s more than portly governor, held several press conferences. During one of the last ones preceding the storm, Chris said simply: If something seems stupid, it is stupid. His statement urged residents to stay off the beaches, move to higher ground, avoid downed power lines etc.

Tonight, we are hunkering down for what might be a significant winter snow event. In the suburbs such weather warnings result in a mad rush at the Stop ‘n Shop, Whole Foods, ShopRite, Price Chopper etc. In New York, we wonder which bars will be open and which restaurants might still deliver if the weather gets really bad.

In the event that (gasp!) restaurants, bars, etc. are closed at some point during the storm, you may want to prepare – You know, rent some movies, learn to knit, dust off the scrabble board…and, please have something ready to reheat and eat. So, you don’t really cook, like ever.

evansweather bill evans nyc abc 7 taco soup

ABC 7 Accuweather’s         Bill Evans

Don’t stress too much. Make something hearty that can sustain you and your crew through the storm…But, something that has ingredients easily accessible and something that’s more than simple to make. And, since Bill Evans, Lee Goldberg and the entire ABC7 Weather Team say that the storm will begin before we are up tomorrow…Please, make it today.

Paula Mac’s Taco Soup (Serves 8 – I know, a lot, but your doormen, neighbors etc. might be hungry too)

Ingredients:

  • rotel tomatoes for taco soup

    Ro*Tel

    2 lbs Ground Beef – 90/10

  • 1 Chopped Yellow Onion
  • 1 Can Kidney Beans
  • 1 Can Black Beans
  • 1 Can Pinto Beans
  • 2 Cans Shoepeg Corn – Ho Ho Ho Green Giant makes one, but if you can’t find it, whole corn kernels are AOK as well
  • 2 Cans Rotel Tomatoes – in the Mexican Food Section
  • shoepeg corn green giant taco soup

    HoHoHo

    2 Packages of Taco Seasoning – El Paso makes this …I use less than the two packages to reduce spice

  • 1 Package Dry Ranch Dressing Mix – In the salad dressing area
  • 1 Heaping TBSP of Brown Sugar
  • 3 Cups of Water

1. In a large stock pot brown the beef and chopped onion over medium heat

easy taco soup cold weather cooking

Simply brown meat and onion

2. Once browned, drain off the excess fat

3. And…This is the hardest part…. Drain and rinse the beans and add those to the meat/onion mix

mise en place for taco soup

Simple Mise En Place: Can you open a can? You can make this soup

4. Drain the corn and add to the pot

5. Open the packages of taco seasoning and Ranch dressing mix and sprinkle over the meat, beans and corn

taco soup taco seasoning recipe

Simply Sprinkle in the dry stuff

6. Open up the cans of Rotel Tomatoes and pour ’em in

7. Add the brown sugar

8. Pour in the water

9. Stir to combine

taco soup recipe easy cooking

Simply BTB/RTS

10. BTB/RTS (Bring to boil, reduce to simmer) and Simmer covered for 1 hour

11. Let the soup cool…then put it in the fridge overnight. This allows the flavors to all meld together and for the soup to thicken a bit

12. Rent some movies, get all other hunkering activities done…..When ready to serve, reheat the soup over med/low and serve

13. Serve with shredded cheddar or Jack / Cheddar cheese, sour cream and tortilla chips

taco soup recipe easy hearty

Simply Garnish with cheese and sour cream

In all probability, NYC won’t be hit that hard with this storm. In any event, it’s a good idea to follow CC’s advice and if something looks stupid, it is stupid. You know what’s stupid? Having nothing to eat if you are stuck inside is stupid. Luckily, you don’t need to panic about starving in the event that you don’t cook and the weather is worse than expected. Paula Mac’s taco soup is not only hearty, impressive and delicious, it seems simple because it is simple.

Fact: Cooking With Kids Is A Ball

monkey bread cooking with kids

Most Fattening Thing Ever

As the little people (not short, but younger) in your life age, they become much more creative, interesting and culinarily challenging.

I’ve just returned from a weekend of kids-cooking in Cincinnati with my niece and nephew (oldest brother’s kids). I used to get away with simple recipes like pancakes and cupcakes and fried chicken… But, now the kids are older and demand more from our kitchen creations.

When my middle brother visits my niece and nephew, he entertains the kids with movie making, science experimentation, Harry Potter regaling and intellectual conversations. He’s a Potter Scholar, Science Junkie and PHD in Philosophy – please address him as ‘Dr. James’.

My visits, though, involve intricate meal planning, grocery list organization, food procurement, inspired baking and cooking.

It starts weeks in advance of my arrival. The kids are old now – 14 and 13. So, I email them proposed menus and we go back and forth via text and email in the days leading up to my visit to solidify a weekend’s worth of kitchen entertainment.

Several criteria for each creation must be met.

Firstly, the culinary endeavors must include an element of artistry.

The Hunger Games Katniss drawing

Katniss by Meggie

anniesdishlist icon

Colored in Post

My niece is an amazing artist – like really good. She gets it from my brother – actually, both brothers draw. I, on the other hand, can barely scratch out a stick figure.

In addition to my niece’s inspired cartoon characters – the AnniesDishList icon – she does incredible portraits.

Secondly…we must satisfy their yen for all things scientific.

nasa john glenn jim lovell astronauts

Real Astronauts

My nephew has been fascinated with science and space since birth. At 14 he has met John Glenn, been to Cape Canaveral, experienced Zero G and has already targeted three universities. Cal-Tech has a partnership with the Jet Propulsion Laboratory (he’s visited) and preps students to join this elite group of scientists. Stanford has the leading research lab for his rare skin condition. And… MIT…because, well, it’s MIT.

dramatic dog cooking with kids

Broken Paw Act

Lastly, we like to layer in a hint of the dramatic. My people are a dramatic people. It’s genetic and inescapable. In my brother’s family, even the dog is dramatic. Unlike most dogs, their dog, Fred, hates going outside. The tiny hypo-allergenic pooch starts to shake with terror the moment he catches a glimpse of his harness and leash. Here’s a pic of the dog trying to avoid a trip out into the snow and cold by faking, yes faking, a paw injury. Apparently, the dog does this every time he’s confronted with the terror of venturing outdoors. Oy!

So the weekend kitchen challenges had to incorporate art, science and drama.

For snacks, we selected a spherical theme. (Everything below is like OTT fattening…don’t judge. They’re very thin, active kids).

Monkey Bread: artistic abilities tapped as we strategically placed dough balls in a pie plate.

monkey bread cooking with kids

Monkey Bread: Most Fattening Thing Ever

I’m not sure why it’s called monkey bread…It should maybe be called super fattening, sugary, buttery bread balls of gooey goodness. We carefully melted an entire stick of butter and then stirred in brown and white sugars and cinnamon. Once the sugars disolve, the resulting gooeyness is creatively poured over every inch of the dough balls before the entire thing is baked in the oven.

Next….Not too dramatic or scientific…but, creative and relatively goodish for the kids and satisfying our spherical theme…We made spinach party poppers. One might argue that the spinach element balanced out our not so healthy Super Bowl weekend indulgences of guac and chips, monkey bread, pancake breakfast etc. One might argue that for sure.

spinach balls appetizers

Parmesan Spinach Balls

Spinach Party Poppers. may be the best way to get kids to eat spinach. And, represented the vegetable portion of our weekend food fest.

Satisfying the scientific challenge was probably the toughest part. In advance of my arrival, my nephew had proposed a series of molecular gastronomy recipes (damn Internet). All of the recipes included ingredients you just can’t get at the local Kroger like Sodium Alginate, Agar-Agar and Calcium Lactate. Some of the recipes included tools not found in most kitchens like an ISI Whip or a Flux Capacitor…at least it may as well have called for one.

We tried to find what we needed. We even called every Brookstone in a 25 mile radius looking for the Molecular Gastronomy kit…And, some super gourmet organic-y food specialty store in Kentucky in hopes of finding any one of the necessary ingredients or tools. But, no go.

So…as we had no ISI Whip we improvised and used a medical syringe to create mozzarella balloons. In the end, the cheesy balloons were as simple as heating up the mozzarella in simmering water. Then wrapping the malleable cheese around the tip of a syringe and inflating the cheese with air. My nephew initially wanted to use my brother’s bike pump – but, if you’ve seen ‘This is 40’, you know no self-respecting 40-something biking enthusiast father would allow that.

molecular gastronomy

Mozzarella Balloon – syringe technique

These were pretty cool. In the Molecular Gastronomy recipe, one can fill the balloons with herbs, spices or other tantalizing aromas by infusing them through the ISI Whip….We were just happy to inflate the cheese and then proudly display the inflated cheese creation.

Meggie ItalyShane ItalyI like that the little people are like real people now. I’m a little biased, and they really are challenging, interesting, interested, funny, smart, creative great kids. In total over the course of three days, we made over 10 culinary creations. And, even though every dish might not have met the artistic, scientific, dramatic challenge, cooking with these two was really a ball.

Subway Spanish And Indulgent Chicken Enchiladas Suiza

enchilada cuida green chiles mexican cooking

Oven Ready

When I first moved to NYC I lived in Brooklyn and commuted each day on the subway to midtown. The :20+ minute ride on the subway each way gave me time to read all of the ads on the trains. Not only did I learn that Dr. Jonathan Zizmor could help with anal warts and fissures (uhm…ewww) but I also picked up a little subway spanish. See, back then a lot of stuff on the subway was translated from english to spanish.

I learned very important phrases like ‘No Se Apoye Contra La Puerta’ = ‘Do Not Lean Against The Door’

and ‘No Pasar Entre Los Cochas‘ = ‘Do Not Pass Between Cars’

Very good information to know in any language.

decision subway campaignBut, I think the best spanish language lessons I ever received were from Julio and Marisol, the main characters in a then AIDS awareness campaign, ‘The Decision’ / ‘La Decision’.

La Decision was a cartoon soap opera that ran in both english and spanish. Every few weeks a new episode was released and we followed Marisol, Julio and their family and friends through the challenges of protecting themselves against HIV/AIDS.

Because the english and spanish versions ran side by side, I was able to read and memorize the spanish while comparing it to the english translation.

In ‘The Decision: I’ the dialogue in spanish goes something like:

chicken enchiladas suiza

Good Choice, Marisol

Marisol: Te amo Julio, pero si tu me amas, tu usas un condon.

An infuriated Julio responds: Un condon!?! Un condon! No!

Ultimately, Marisol wisely determines that though she loves Julio, she doesn’t love him enough to die.

There aren’t as many spanish translations on the subway anymore. A shame because I feel like I’ve maxed out the use of the three or so phrases I do know. I mean how often can I tell people not to lean on something?

I miss those La Decision cartoon episodes whenever I ride the trains now.

One big decision I have to face is how often to make super fattening, indulgent foods…

Warning: the following recipe is more than fattening…use sparingly.

Chicken Enchiladas Suiza (serves 6-8)

Small Space Smarts:

  1. It’s fried….so, your apt will smell like fried, but the aroma dissipates and is worth it. Use a deep pot when frying the tortillas to minimize fry splatter
  2. Buy the Goya Salsa Verde – yes, you can make your own, but it’s labor intensive and means more dirty dishes, expensive ingredients and hassle
  3. Use a rotisserie chicken – even in NYC the rotisserie chickens are more cost effective than buying and roasting a whole chicken or chicken pieces. Not to mention the rotisserie chix are better than you can make at home and time saving.
  4. Bonus – the enchiladas can be prepared well ahead of time and baked off later. So the work will be out of the way and your kitchen can be clear and cleaned when your guests arrive.

Ingredients

  • 4 Cups Cooked White Meat Chicken shredded (you can use dark as well – your call)
  • goya salsa verde enchiladas

    Let Goya do the work

    mild green chiles la preferida

    Roasted, Peeled and Diced

    1 4oz can La Preferida Mild Green Chiles – roasted, peeled and diced

  • 1 jar Goya Medium Salsa Verde
  • 1/2 tsp salt
  • 2 Cups heavy whipping cream…you can use half/half as well, but not whole or skim milk
  • 12 Corn Tortillas – 8 inches in diameter – the medium sized ones from Mission work perfectly here
  • Vegetable or canola oil for frying – do not use Olive Oil
  • 2 Cups Monterrey Jack Cheese – shredded
  • 3-4 Green Onions – chopped
  • Sour Cream and Salsa as Condiments

Preheat the oven to 350 degrees

1. Shred the rotisserie chicken and put into a bowl

Price Chopper rotisserie chicken enchilada

Carne de pollo blanco

2. Pour the chiles and salsa verde over the chicken and mix well. Your hands are your best tools here – so dig in and mix!

enchiladas suiza chiles le preferido brand

Add the Canned Chiles and Salsa Verde

mixing chicken enchiladas suiza

Mix with Las Manos (those are not my hands)

3. Mix together the whipping cream and tsp of salt in a round baking dish – pie plate or similar would work nicely here

chicken enchiladas suiza

La Crema

4. Fry the tortillas in 1 inch of very hot oil just until blistered and limp. Try not to over-fry because the tortillas will then be hard to roll

fried flour tortillas for enchiladas

Tortillas Frita

5. Drain the fried tortillas on paper towels and blot to remove excess oil

6. Dip the fried tortillas into the cream/salt mixture

7. Place the fried and cream dipped tortilla onto a flat work surface and add about 1/3 cup of the chicken mixture in a line to the center of the tortilla

chicken enchiladas suiza

Enchiladas Del Balanceo

8. Roll fairly tightly

9. Place the enchilada into an ungreased 9×13″ pan, flap side down

chicken enchiladas suiza nestling

Nestle the enchiladas

10. Repeat until all 12 tortillas are stuffed and rolled and nestled into the pan – depending on thickness, you may have to use two pans

nestled enchiladas suiza

Final Nesting Place

12. Pour the remaining cream/salt mixture over the rolled and nestled tortillas

13. Sprinkle the cheese over all of the enchiladas

14. Sprinkle the sliced green onions over the cheese

enchilada cuida green chiles mexican cooking

Oven Ready Enchiladas Suiza

15. Bake in the oven for :20 mins…until the cheese is melted and the enchiladas are well heated and bubbly

chicken enchiladas suiza out of the oven

Del Horno

16. Serve with a garnish of tomato salsa and sour cream…and refried beans and spanish rice on the side

I know this recipe says ‘serves 6’….but they really are rich, creamy and delicious and each of our dinner guests needed just one or one and a half. It depends how much chicken you put in each enchilada.

La Decision Uno here might be to make these enchiladas just once or twice a year. I wish I spoke more Spanish, because all I can tell you is that if you eat these enchiladas too frequently, you may not want to apoye contra la puerta – or against anything else.