Swimming in Mustard: Halibut with Mustard Sauce

mustard sauce for fish whole foods dinner pescatarian

Halibut Swimming in Mustard

A few years back – this is my old-lady saying for the day – I was on a fishing trip in Florida. We might have gone out the night before until really late (old-lady late, like 11 or something) and we may have had some wine. All of this is irrelevent. Regardless, the 6:30am departure from the dock for a day of off-shore, deep sea, dolphin-fish fishing was a bit rough.

But, I grew up on boats and don’t have a tendency toward seasickness. So, really, I was just very tired.

halibut dinner mustard sauce pescatarian vegetarian

We were not hunting Flipper!

We ventured out – way out – like a gillion miles offshore – to hunt down the coveted dolphin-fish – relax, not Flipper, the beloved Dolphin mammal.

The trip out to sea provided me with a much needed onboat nap.

I won’t tell a fisher-gal tale and lie about how many fish we caught. Cuz, we didn’t catch anything for a long, long time. Maybe we caught a handful (OK, two) fish that were too-small to keep…but no more than two.

heminway halibut mustard sauce pescatarian vegetarian fish

Read it

Until the very end of the trip. At hour 5 as we were getting set to pull in the lines and head back to the dock, I hooked a dolphin-fish. The fish was a lively one, indeed. OK, it didn’t give me an ‘Islands In the Stream’ (Hemingay reference, not Kenny Rogers/Dolly Parton, look it up) battle – But, it did give a bit of a fight. When I pulled the fish into the boat, both of us, the fish and I, were exhausted. The boat guys put the dolphin into the fish well and kept it alive as we motored back to the dock.

When we landed, the guys (they’re not called ‘gillies’ or ‘fish mongers’…not sure what they’re called) filleted the fish and put 3lbs of amazingly freshly caught dolphin fish into plastic bags. They directed us to a dock side restaurant where the chef would cook our catch to our specifications. Amazing concept – like living off the land, or the sea in this case.

One of our crew ordered her fish blackened and the other two of us ordered it meuniere. Within :30minutes of catching the fish, a chef was preparing it – just as we wanted it. Very cool…

Yeah, until I realized what had happened. I couldn’t eat it. Not a bite. This amazingly fresh, fish that I, myself, had caught.

And, neither could my Florida fishing pals.

One of them looked at me and said…’What’s wrong with us?’

And with great sadness for the fish I replied…’One minute you’re swimming in the ocean and the next minute, you’re swimming in butter.’

The timing was just too tight.

So, when planning a fish dinner, I highly recommend buying your fish at WholeFoods or a good fish place…Because catching and eating is just too sad.

Halibut With Mustard Sauce (serves 4)

Tiny Kitchen Tips:

  • Prepare the marinade ahead of time as you’ll need the counter space for the rest of your prep work AND it’s good for the flavors to meld together for a bit in the fridge
  • central park fireworks food recipe dinner halibut

    Dinner Entertainment

    If there’s an unexpected fireworks display out your window AND you’ve invited gays to dinner, be prepared to keep the meal warm while the boys marvel at the lights over Central Park

  • Get a tiny whisk – it’s like my fave new thing BECAUSE 1. it’s tiny and fits well in your limited drawer space 2. it’s incredibly useful for whisking together marinades in small bowls

Ingredients:

  • mustard halibut sauce dinner food pescatarian vegetarian

    Mise En Place

    1 1/2 – 1 1/3 lbs of Halibut (for the hell of it) Cut into 4 equally sized fillets. The halibut at WholeFoods was $22.50/lb yesterday, not bad for NYC

  • Sea salt and pepper – for the fish
  • 1 TSP salt for the sauce
  • 1/2 TSP pepper for the sauce
  • 8 ounces of Creme Fraiche – I bought some at WholeFoods or you can make your own
  • 3 TBSP Dijon Mustard
  • 1 TBSP Whole Grain Mustard
  • 2 TBSP Minced Shallots
  • 2 TSP Drained Capers

1. Whisk together with your tiny little baby whisk the two mustards, creme fraiche, shallots, capers and salt / pepper. Cover and refrigerate for at least :30mins

mustard halibut marinade dinner vegetarian food

Use your tiny whisk here
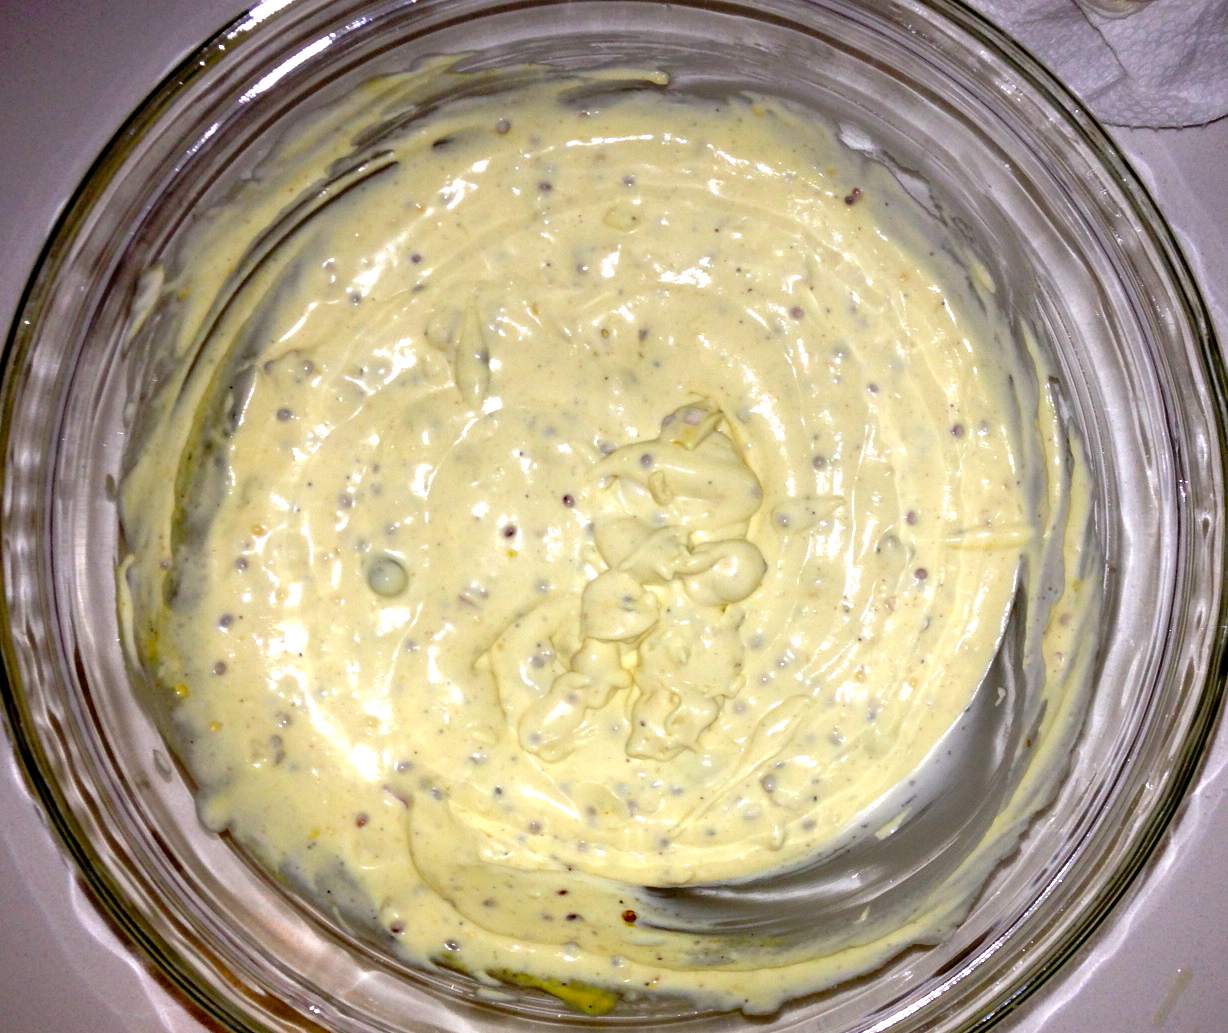
mustard sauce for fish recipe food vegetarian pescatarian

MMMMustard Sauce

2. Preheat oven to 425 degrees

3. Line a baking dish with Reynold’s Wrap Pan Lining Paper – expensive, but I love it

pan lining paper spinach balls recipe

Shiny on the bottom, parchment on the top

4. Place the fillets skin side down on the paper and sprinkle with salt and pepper

halibut with mustard sauce pescatarian vegetarian dinner fish

See, my fillets weren’t all the same size. FAIL

5. Cover the fillets generously – more of a slather, really – with the mustardy sauce
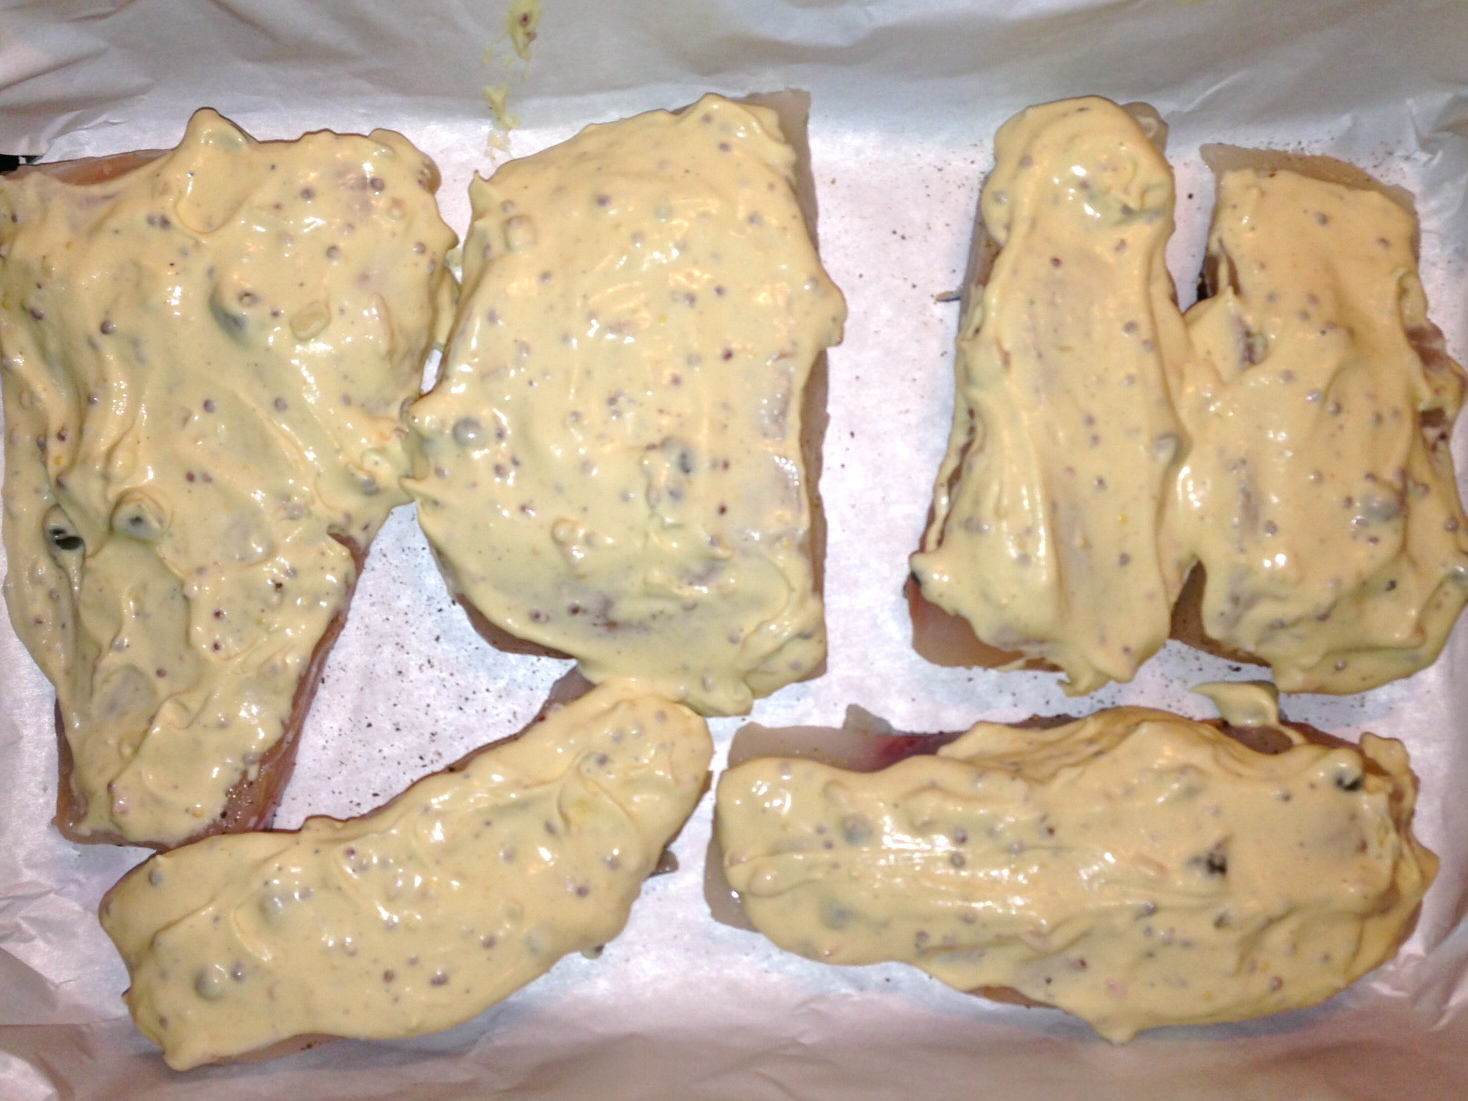
halibut recipe dinner mustard sauce

Smothered in Sauce

6. Bake for :15 minutes…until the fish is flaky

7. Plate the fish – preferably on a sea-themed platter and spoon the sauce from the baking dish over the fish. The fish should be swimming in sauce

pescatarian recipe dinner food halibut sauce

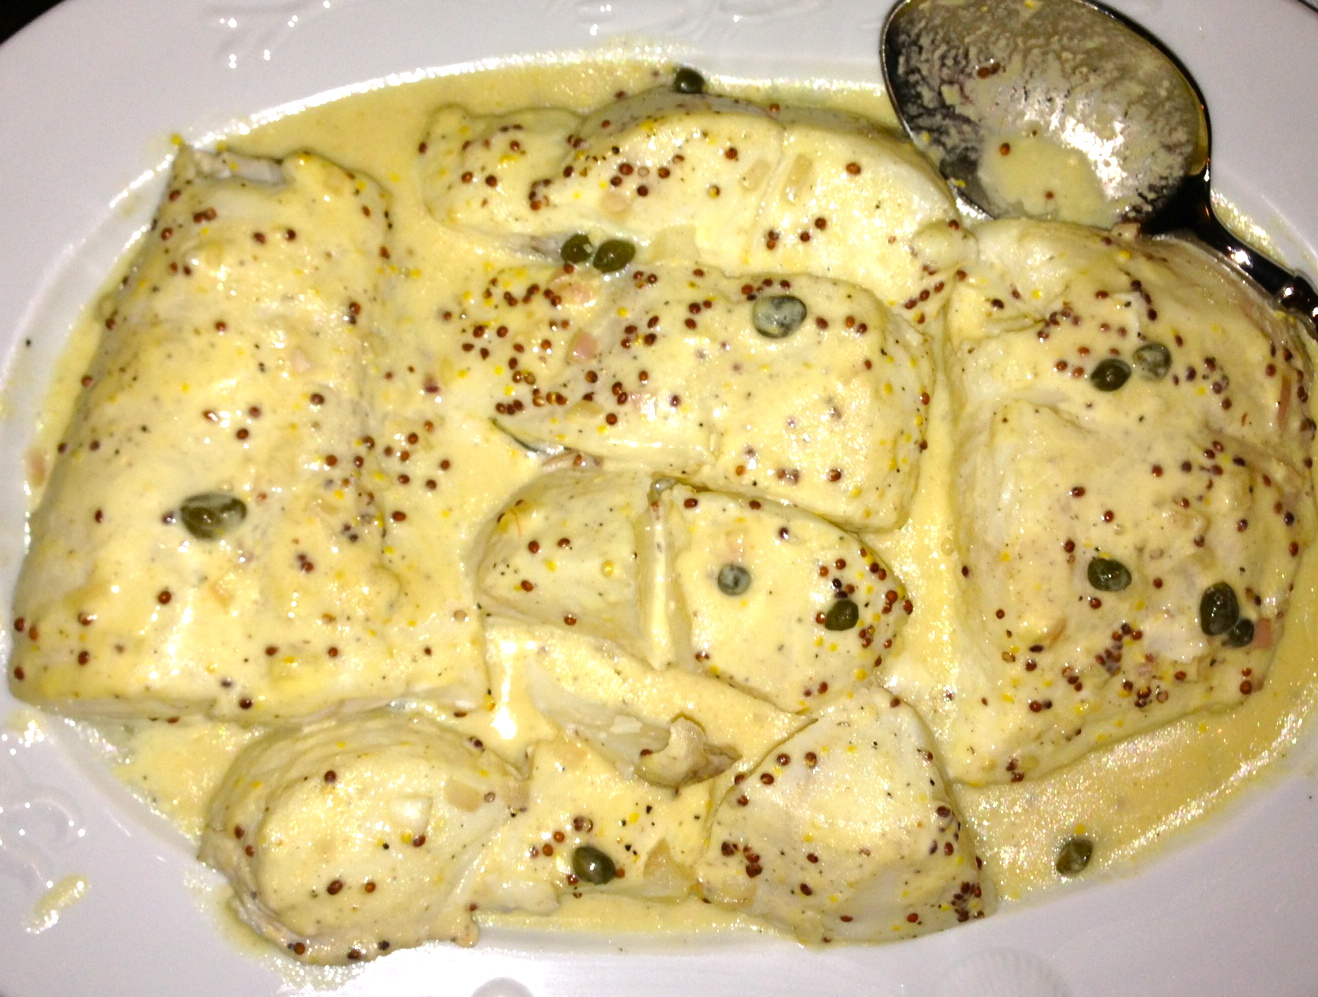
Swimming in Mustard Sauce

8. Serve

I like fishing. I do. But, I really don’t need to catch anything and eat it. Maybe this is part of the evolution of man (woman)…We have WholeFoods. We don’t have to live off the land or the sea.

So, I’ll leave the fishing to the fisher-people. And, stick to what I know: I love a fish dish swimming in mustard as long as I didn’t find the fish first swimming in the ocean.

Advertisement

Killer Griller: Smoked & Barbecued Baby Back Ribs

baby back ribs smoking ribs city barbeque sauce

Finished Ribs with Smoke Ring (that’s the pink edge) and Sweet BBQ Sauce

New York is one of the biggest cities in the world…OK, like 38th, but that’s pretty big. Still, there are things you just can’t do here.

Like big meat grilling…I mean unless you have a big terrace, deck, back yard (ha!)…you just can’t outdoor grill. And, then there are those pesky laws about transporting gas tanks – like for a gas grill – through any of the tunnels or over any of the bridges. Uhm, this is an island, how am I supposed to transport my off-island bought gas tanks?

No worries…With any luck, we have all found friends and relatives with places outside of the city. In a perfect world, these generous people who open up their homes to us, have a grill. While I prefer a gas grill, no need to be picky…In many cases a charcoal grill is actually better.

On a recent trip to Cincinnati – remember, where my people live and cheerleaders date minors – I marveled as the grill master (aka, my brother) made some unbelievably good smoked and bbq baby back ribs using his old school charcoal Weber grill.

Tiny Apartment Tip: Make friends with homes off the island….

Hickory and Applewood Smoked Baby Back Ribs (serves 6)

Warning: This is an all day event….but, you’re in the country or at least out of the city, what else would you be doing?

Ingredients:

  • baby back ribs smoked barbeque kroger

    Kroger Baby Back Ribs – I think these were each over 3.25lbs – and very moist and tender

    2 giant packages of pork baby back ribs – 3.25 – 3.5 lbs each

  • city barbecue barbeque original sauce

    City Barbeque Original Sauce

    1 – 2 cups City Barbeque Original Barbeque Sauce

  • 2 TBSP Sea Salt
  • 2 TBSP Garlic Salt
  • 2 TBSP Garlic Powder
  • 2 TBSP Onion Powder
  • 1 TBSP Paprika
  • 2 Meat Injectors worth of Bacon Grease  – just go with it
  • A Bunch of Hickory Chips
  • A Bunch of Applewood Chips

1. In a large bucket or pot or bowl or whatever, combine the wood chips, cover with water and soak for at least 2 hours…

dinner baby back smoked barbeque ribs

The Bucket Method for wood chip soaking

2. Remove the ribs from packaging and peel the membrane from the back side. This was a bit tricky because the membrane is slimy and tough to pull off…but, you can lift the edge of the membrane with a butter knife and then use a paper towel or rubber tongs to pull back the membrane

baby back ribs pull back membrane

Paper Towel Pull Back Method

3. In a bowl, combine the Sea Salt, Garlic Salt, Garlic Powder, Paprika, Onion Powder. We also threw in some Hickory Flavor Rub…

4. Rub the meat on both sides generously with the spicy mixture – my anal retentive brother puts his hands in plastic baggies and then rubs…but you can also just use your bare hands and, omg, wash them after – your call

Smoked grilled barbeque baby back ribs

Generously Season both sides…

5. And, this is pretty OTT…but, whatever…Using your meat injector (a tool only found in Sweeney Todd’s or Hannibal Lector’s collection…or the home of teenage boys who like science and bacon) Inject each rib with a good squirt of bacon fat…Yeah, that’s right, we injected pork fat into pork ribs…

meat injector bbq ribs

OTT Meat Injection: Bacon Fat into Pork. Yeah, we did that.

6. Wrap the ribs tightly in tin foil and put in the fridge – ideally overnight – but, at least 3 hours

dinner barbecue smoked baby back ribs

Wrap the Ribs tightly in Reynold’s Wrap

7. After the overnight dry rub fridging….Prepare your grill – this is a charcoal grill only event:

smoked barbecue barbeque baby back ribs

Indirect Heat…And, snow. Grilling knows no season (see no charcoal or wood chips in the middle)

  • Set the grill for indirect heat – that means the center of the grill basin doesn’t have any charcoal in it…but, instead, the charcoal is in two piles – one on either side of the grill basin. My brother used bricks to keep the charcoal piles contained to the side of the grill – he’s smart like that.
  • Get the charcoal going, then cover the charcoal with the wood chips and replace the grate
  • Cover the grill…and, yes, it’s going to smoke…a lot…that’s the point

8. Prepare your ribs for the smoking process…In my brother’s case this meant:

smoked bbq baby back ribs tools

Murderously Fabulous Grill Gloves and Rib Rack

  • Don some murderous looking grill gloves….these are like totally jacked up kitchen gloves – specifically designed to withstand great heat
  • Spray a rib rack (again, not a city accoutrement, but apparently quite the rage off the island) with non stick cooking spray
  • Place each rib in its own rack slot
  • Using a large skewer (preferably a wooden one that you’ve soaked for at least :30mins) pierce through the ends of each rack to elevate them
barbecue barbeque rib rack

Racked and Elevated Baby Back Ribs Smoker Ready (not murderous gloves)

9. Place the racked ribs on the grill and cover. Cook for 2 – 2.5 hours

baby back ribs in weber grill smoking

Smoker in the Snow…Ribs Racked and inside

10. Remove the ribs from the rib rack and place in a large, high sided pan. Preferably a tin foil one you can pitch afterwards…

11. Generously cover the ribs with Barbeque/Barbecue sauce – we used City Barbeque Original Sauce…pretty good

City Barbeque original sauce baby back ribs

BBQ Saucification of the Ribs. A family affair.

12. Preheat oven to 250 degrees

13. Cover the ribs with tin foil and put in the oven for 2 hours

14. After the low baking process…remove the ribs from the oven and from the pan…BUT, don’t eat yet! Nope, put the ribs on a cutting board and cover with tin foil for up to an hour to give the meat a chance to rest and re-juicify

15. Slice and serve

baby back smoked bbq pork ribs sliced

At Last….Slicified and Ready to Serve

The ribs were fall off the bone amazingly smoky, sweet and fabulous. Took all day…but, more than well worth it.

If you’re lucky enough to guest at the home of a Killer Griller…try this.

My brother and I have always been pretty competitive with one another – it’s a gene, I think. And, let’s just be honest, I’m the much better cook. That said…my brother is a Killer Griller.

If At First You Don’t Succeed: Pie Pie Again

grey goose pie crust

Vodka Infused Pie Crust

Perhaps the only thing uglier than my handwriting, is my pie crust. So, don’t expect a lot of pictures in this one…

I watch a good number of cooking programs and am always in awe of the ease with which Ina or Giada or Melissa D’Arabian rolls out a perfect pie crust. ‘How Easy Is That?’ Ina always says as she places the perfect crust into the pie pan. Each of them assured me that making my own pie crust would be a much better option than buying a store bought one in my grocer’s freezer.

Challenge really is that I don’t like pie. I’m not a baker. I’m not a sweets eater or much of a fruit eater. I do, however, enjoy a good pie crust – it’s like bread, my favorite food group. During the holidays, I’m the person who picks around the apples in the apple pie and dips pieces of crust into the gooey filling. I’m the person who sneaks into the kitchen and pulls a piece of the crust off of a cooling pie.

But, I’m up for the challenge. And, so I spent some time researching the perfect pie crust recipes.

This is a combination of a few recipes that I found online. And, it really wasn’t hard…until I had to roll it out and carefully place it into my makeshift pie pan – this is where I had to Pie Pie again.

Perfect Pie Crust (makes 2 crusts – theoretically for the top and bottom of a pie…or, in my case, one for the bottom of an open-faced pie, one for ‘practice’)

Ingredients:

  • Grey Goose Vodka infused pie crust

    Yay! Vodka!

    2 1/2 Cups Gold Medal All-Purpose Flour

  • 1/4 TSP salt
  • 2 TBSP Sugar
  • 12 TBSPs Cold Butter – cut into 1/4 inch slices
  • 1/2 Cup Cold Vegetable Shortening – cut into 4-6 pieces
  • 1/4 Cup Cold Vodka (Yay! Vodka! I don’t drink it anymore – that’s another story –  and it evaporates – so this is AOK for all)
  • 1/2 Cup cold water
vodka infused pie crust

Butter Makes it Better

1. Take the butter and cut it into 1/4 inch slices. Cover and put into the freezer for :10mins or into the fridge for :30 mins

2. Measure out the food shortening (I used Crisco…is there another kind?). And place into the freezer for :10mins or the fridge for :30 mins

3. In the bowl of a food processor, Pulse 1 1/2 cups of the flour, the salt and all of the sugar until combined – about two quick pulses

vodka infused pie crust

I heart my Cuisinart

4. Add the butter and shortening and process until a dough begins to form and cottage cheese looking curds appear

vodka infused pie crust

Food Shortening Kinda Grosses Me Out

5. Scrape down the bowl and add the remaining flour – pulse just until the mass of dough has been broken up

6. Empty the mixture into a bowl

7. Sprinkle the water and the vodka – I used Grey Goose, cuz that’s what someone recently brought over

vodka infused pie crust

Pie Crust Gets Drunk

8. Use a spatula to carefully fold the water and vodka into the dough until both are completely absorbed. Don’t over mix!

vodka infused pie crust

Carefully fold in the booze and water

9. It’ll be super tacky…Divide the drunken dough in two, make two balls of dough, flatten each and wrap each in plastic

10. Put the flattened balls of drunken dough into the fridge for at least an hour and up to 2 days

Baking the Pie Crust for an open faced savory pie:

Here’s where my creative abilities were truly challenged…and, I lost.

OK, I don’t like sweet pie, so decided to make an open-faced veggie filled pie for my vegetarian friends who came to dinner last night. Luckily, that meant I only needed one of the pie balls. Good news, because I failed the first time I tried the following:

Pre-heat oven to 425 degrees (that part I did perfectly!)

1. Remove one of the drunken pie balls (sounds dirty, isn’t) from the fridge and allow to warm up for a few minutes – not too long, just until the dough can be safely rolled out

2. Place one ball on a large piece of Saran wrap dusted generously with flour

grey goose infused pie crust

Still Hopeful At this Point

3. Place a large piece of parchment paper on top of the pie dough

4. Roll the pie dough through the parchment paper into a circle large enough to line the pie pan. I don’t have a pie pan…and really don’t need one…so I improvised with my round glass baking dish.

5. Try to carefully place the rolled dough into the makeshift pie pan. FAIL horribly. Mold that dough back into a ball, cover in Saran Wrap and put back in the fridge

6. Pie Pie again….Remove ball #2 from the fridge and repeat steps 1 – 4: This time, carefully roll the rolled out dough onto a heavily floured rolling pin and unfurl the dough from the rolling pin gently into the makeshift baking dish – much better

7. Cover the baking dish (or pie pan) with plastic wrap and refrigerate for at least an hour

Shop online, clean the apartment…whatever

8. Remove from the fridge, cover the dough completely with parchment paper

Ceramic pie weights

I bought pie weights!

9. Place pie weights into the base of the pie dough and ‘blind bake’ for :20 minutes. You can apparently also use dried beans as pie weights…but, I don’t have a giant bag of dried beans (small apartment, remember?)

9. After :20 minutes in the oven, remove the pie weights and parchment paper, pierce the bottom of the pie crust with a fork – like a whole bunch of times to keep the pie crust from puffing – and bake for another :05 – :10 minutes until the crust is a light golden brown

reynold's wrap drunken pie crust

Not Pretty, But Delicious!

10. In the second baking, I foil wrapped the edges of the pie crust to keep them from burning

And….your drunken crust is prepared for filling!

I gotta say, the pie crust was delicious – light, flaky, no vodka taste. It provided the perfect vessel for an open-faced veggie pie. (recipe tomorrow)

Of course it wasn’t as easy as Ina had assured me. But, thank goodness for a do-over…Cuz, in this case, after a first fail, I had to Pie Pie again…