Place Invaders: NYC Creepy Crawler Protection

I hate bugs. All bugs…yes, even butterflies and lady bugs. When it comes to bugs, I do not discriminate.

lady bug kitchen solutions nyc kitchens

This bug is no lady

Part of the hate I have stems from my innate fear of all things crawly. It’s genetic. No escaping it.

For example…I was having dinner once at an outdoor restaurant in Florida and a giant bug flew onto the table. I probably leapt about 30 feet into the air and screamed. (Divide that 30 feet by my propensity to exaggerate…but, I jumped nonetheless). The lovely waitress rushed over and realizing it was just a bug, looked at me, exasperated and said…’It’s just a palmetto bug’.

Yeah, uhm, I’m from New York…that, my dear waitress, is a cockroach. AND, I checked with the bug experts at Orkin who told me: ‘There is no difference between a cockroach and a palmetto bug. The cockroach is also known as the waterbug, Croton bug and palmetto bug.’

kitchen protection from bugs nyc

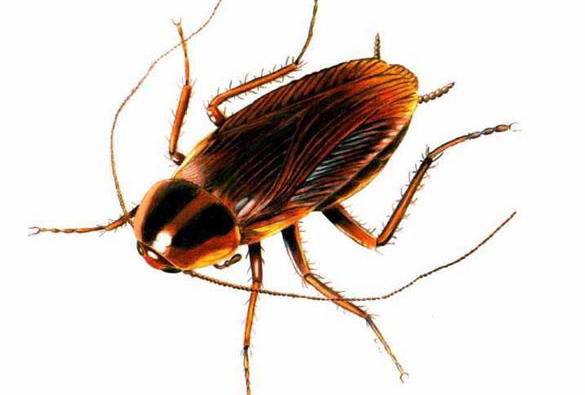
You say Palmetto, I say…

I also lived in a pretty big one bedroom in a rent stabilized building for a while in the 90’s. Finding a good sized, one bedroom in a rent stabilized, full service building, on the upper west side is pretty much the coup of coups. But, the low low rent came with its own price…a mouse or two here or there. Not good for the crawly-ophobe.  And, I may have spent a night or two locked in my bedroom with towels shoved under the door to keep my ‘guest’ from coming in while I slept. (Note…have the super, friend etc, plug all gaps around your plumbing with steel wool. The mice can’t chew through it and will find another home to visit.)

mouse in the house nyc kitchens solutions

Not this cute in real life

Recently, a friend who had relocated from Los Angeles told me she spied a mouse running across her living room floor last week. Her attitude: ‘Thank God it wasn’t a cockroach.’ After only five months in our fair city, she’s already a true New Yorker through and through.

I know what you’re thinking, reader(s)…where is she going with this? And, is she really going to talk food after talking bugs and rodents?

No. No, I’m not.

I am going to take you through a list of perhaps insane precautions I take in my own tiny NYC kitchen to avoid the occasional creepy crawler. Because even in the swankiest of buildings, a bug or two will fall.

Tiny Kitchen Tips:

  1. progresso spaghetti ny ktichens

    Bag in a Box

    All bread products – bread, cereal, crackers – go in the microwave. The microwave is airtight…so, not only will it protect your breads safe the crawlers, it will also help to keep them fresh longer

  2. Once a package of anything is opened…its contents are put into a ZipLoc bag before being put back into the box. This means cereal, pasta, sugar, brown sugar, Bisquick, panko bread crumbs, rice…anything you are keeping in your pantry (read, kitchen cabinet assigned to food)
  3. coffee container canister flour bed bath and beyond

    Sealed

    Flour is allowed on the counter…BUT only because I keep it in a glass, airtight canister sealed at all times.

  4. Coffee is also allowed on the counter…But, only because it too is in an airtight container sealed at all times.
  5. Chef’s salt and pepper are allowed on the counter…in these cute little Cuisinart prep bowls and covered with Saran Wrap at all times

    salt and pepper prep bowls cuisinart

    S & P – in Cuisinart Prep bowls and covered

  6. The only foods allowed out, uncovered on counters are:

Unripened avocados (no getting around this)

Potatoes/Sweet Potatoes

Garlic/Leeks

Onions/Shallots etc

Tomatos – these do not go in the fridge

Listen, I live in a very nice, maybe even, swanky, building. But, you can’t know what happens outside of the building in which you live, or even in the hallway for that matter. You just can’t prevent the stray bug from crawling out of a delivery and then making its way to your apartment. Maybe it’s a roach on the bottom of a grocery bag, maybe it’s a wheat bug living in your cereal box. You can, however, ask your super to put a sweep at the bottom of your door to minimize the chances of that happening. I need to do that now that I think of it.

nyc tiny kitchen pantry bug prevention

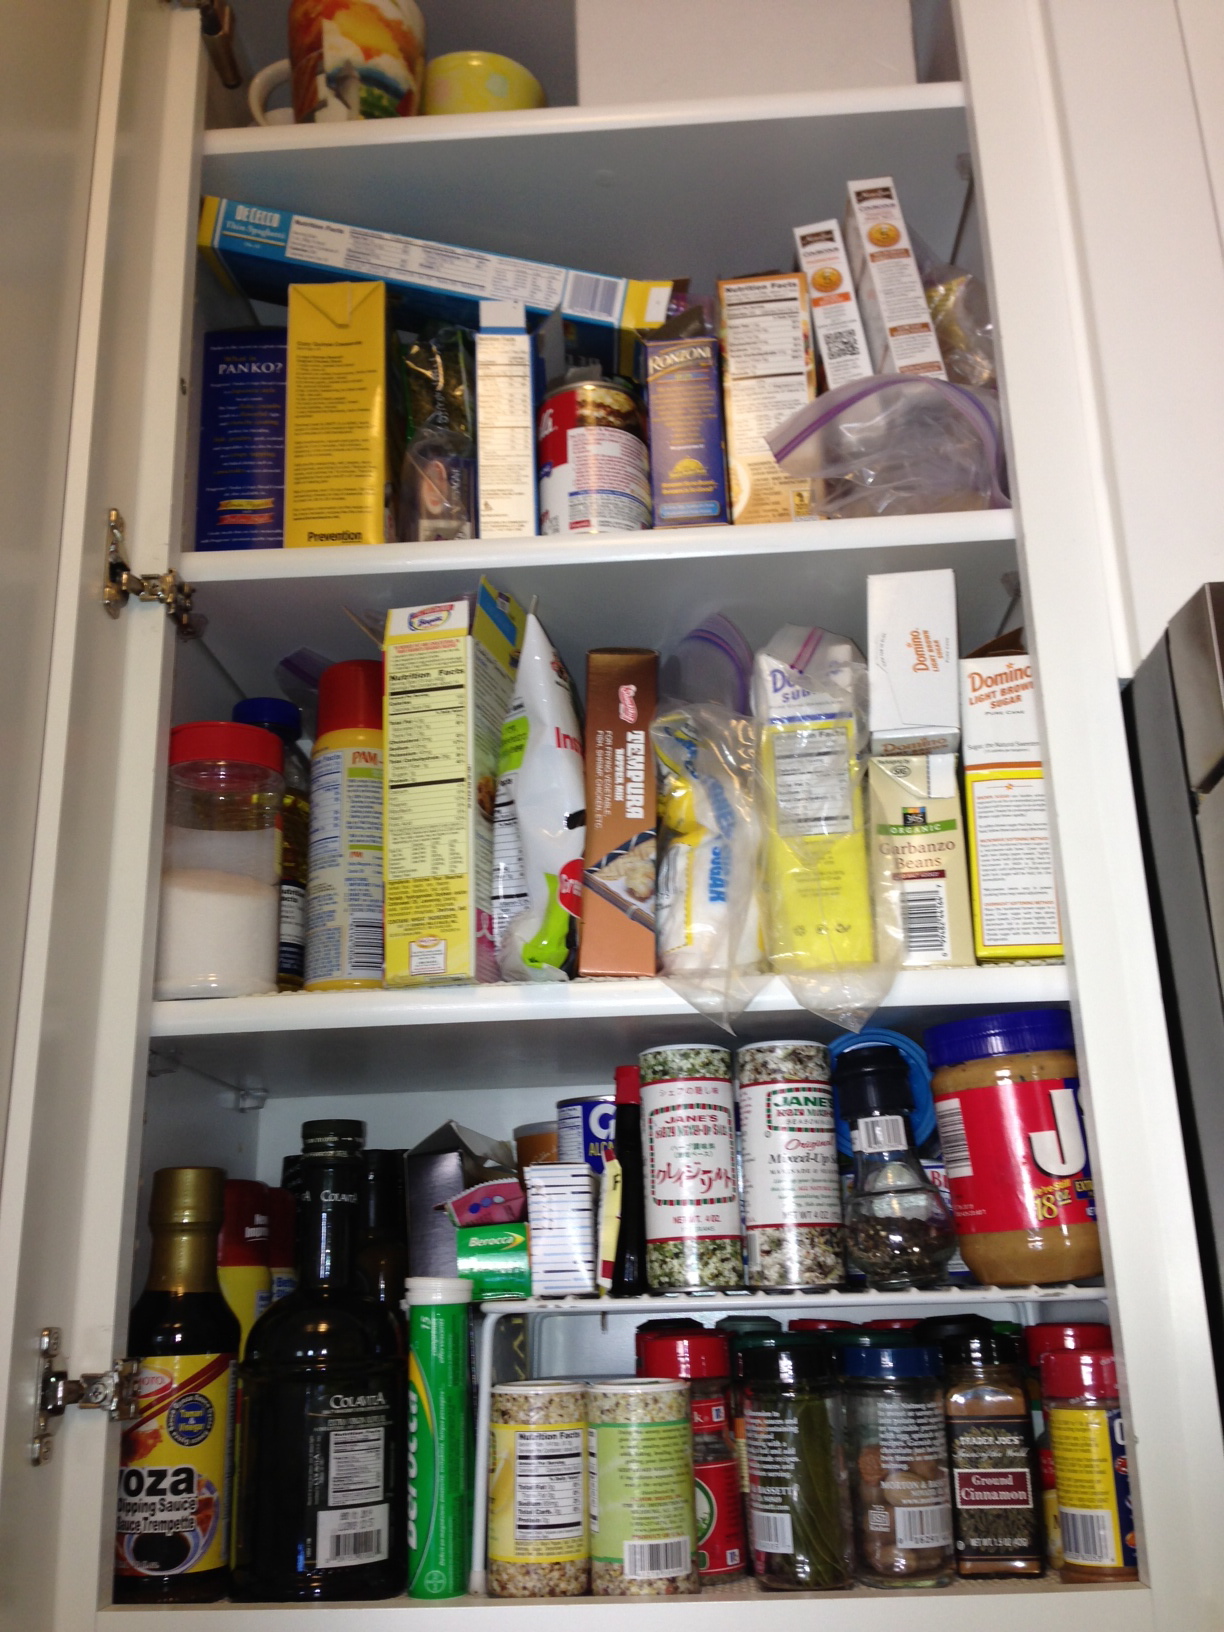
NYC Pantry Protection

Every place has its invaders. When I lived in CT, there were these nasty, prehistoric, thousand-leggered things in the house….way worse than a stray cockroach, I think.

And, don’t even get me started on when I was lucky enough to visit my peeps in Cincy during the 17-year Cicada infestation…really apocalyptically disgusting.

Is my tiny NYC kitchen protection strategy a bit OTT? Maybe…Aaaaaand, I’ve never seen a bug or a crawly critter here. Never.  So, having my very crowded and ZipLoc bagged and boxed pantry look like this…Is well,…well worth it.

If you have other tiny kitchen place invader protection tips, please tweet to me @anniesdishlist.

Advertisement

Pan Abuse: And the Schtick on Non-Stick

non stick fry pan care

Not so sticky

So….I’ve been guest cooking a bunch lately. (Read, cleverly escaping the cold and inviting myself to friends’ homes located in warmer climates – trading off home cooked meals and kitchen tips as currency).

On one such recent stay, I was at the home of a friend who had lost pretty much everything in a dryer fire – v dangerous those dryer fires, fyi. She and her husband had culled through their belongings and tossed what they deemed ‘unsalvagable’. Sux.

711 slurpees dinner fast food

Dinner

They don’t cook with any regularity. OK, they don’t cook at all. Not their thing. They both work full time, they have three kids (fab boys), 4,500 baseball games per week and then more on the weekends….yada yada yada. There’s a lot of pizza, pasta, mac & cheese, take out, slurpees, bagel bites (huh?), refrying, reheating, microwaving. You get it.

When it came time to assess their kitchen stuff post fire…well, most of what they had in their culinary arsenal, was as old as their marriage…but, had not fared as well, I’m afraid.

Some of the damage everything in their kitchen suffered was due to the fire. But, maybe more of it was due to years of use and abuse.

chicken milanese teflon pans

8-yr old sous chef!

Which brings me to their current frying pan situation. I was gearing up to make chicken milanese for them and their brood of boys  – 8, 12 and 14, so grown up…seems like just yesterday I was teaching them the diarrhea song.

Anyway…When I asked for a large fry pan, my choices were limited. If there were larger fry pans at one point in their world, those have long since been tossed or lost. My hostess with the mostest handed me two options:

  1.  a 10-inch non-coated fry pan
  2. a 10-inch coated fry pan…whose coating was tattered, flaking and torn
Teflon flaking pan

Abused Pan: So So Sad

So, I got to thinking about the care and feeding of non-stick pans and did some research on the Internets.

My my! People are passionate about Teflon. Seriously, very emotionally heated debates online. I found one woman who wrote an entire article about how the fumes emmitted from her teflon pans had killed her canaries. OK, if she says so.

Others cited sources from Wikipedia to NASA and research studies from Harvard to Stanford. There are usage guidelines, recommendations on what temperatures to cook at or below, how to store, how to recycle, which tools are OK to use on teflon pans, which are not, how to clean. There are literally thousands of blogposts, studies and articles with millions of tips, tirades and touts.

All that and still, I couldn’t really figure out if Teflon in and of itself kills canaries…

Here’s the Schtick on caring for Non-Stick.

  • Throw out your coated teflon pans that have suffered scuffs and scrapes from years of abuse. We don’t really know if you (or your canaries) will DIE if you accidentally injest a flake or two of teflon. But, do you really want to find out?

More importantly, once the teflon coating is compromised, the non-stick aspect of the pan is ruined. RUINED, I say. So, pitch the pan for this reason alone.

  • Do not use a metal spatula, but rather a rubber or silicone one – OK, I’ve used my fish spatula with a non-stick pan, but very very gently!
  • Do not put coated pans under the broiler or on a stove top set higher than medium..especially if you own small birds or other tiny pets that might inhale air contaminated with teflon particles – this is cited as the danger in exposing teflon to extreme heat
  • Do not put coated pans in the dishwasher…apparently, that too is bad bad bad for them
  • Put some paper towel or cloth between your pans if you stack and store like I do…it will keep them from scraping AND from making that clanking noise when you put them away or take them out.
  • Bear in mind that everything has a shelf life – sadly, even your pots and pans. So, evaluate the condition of the pots, pans, Santa Christmas lawn ornaments, giant salt and pepper shakers and whatever else you might have received as a gift from your first wedding. It may be time to toss these.

Toss and replace…but how?

macy's home goods one day sale

The 4-day 1-day sale is upon us!

Today I spent some time in Macy’s home section. It’s the preview to the preview of the 1-day sale that starts Friday and ends Sunday night. Plus, I had a 20% discount card and a $20 off card. AND, I went to the ‘closeouts’ room…a lovely woman told me about this secret and fabulous place.

williams sonoma silicone spatulas

Gentle Spatulas

Inside the secret ‘closeout’ room, I found a two-frying pan, 10″ and 12″, non-stick, oven safe set. As a thank you for last weekend and a pre-thanks for this coming weekend…I’ll be hand delivering these to my pan abusing pals tomorrow. And, to be sure that these shiny new non-stick pans don’t meet the same tragic abuse as their predecessors, I’m also bringing my hosts a silicone spatula and the schtick on caring for non-stick.

We Embrace Change and Coconut Curry Shrimp

shrimp dinner

Embracing Change: Coconut Curry Shrimp

More than 2 years have passed since lovely Sarah Palin asked ‘How’s that hopey, changey stuff working out?’ Don’t worry, we’re not going to talk politics here. But we are going to talk change.

Sarah Palin Asks the Question

Very early in my career during a round of pretty significant layoffs through which I survived, I learned that: ‘Change is good. We embrace change.’ That’s what one of the higher-ups told us, the lil’ people, at the time. And, I repeated it a lot in my head – like orphans who learn to soothe themselves by rocking in their cribs – I managed the shock of watching 30% of the company being marched out the door and soothed myself by repeating ‘Change is good. We embrace change’ over and over and over again. I repeated it until I actually believed it. And it’s been a mantra ever since.

Now, I do admit that not all change is easy to swallow. The mass firing wasn’t fun for anyone, but it was good in the long run for the company – and, a great learning experience for my younger self.

Personal change (as opposed to personnel change) can be tough to handle as well. Last night, for example, my 70-something-year-old father asked to borrow my readers because he forgot his.

That’s right. I now have readers. Still sort of hyperventilating from that one. I do feel the need to announce here that my ‘readers’ are only 1X AND as per my eye guy, I have better than 20/20 vision – it’s just that my eyes have changed and I can’t see menus, in small print, in dark restaurants, whatever. Let’s not discuss this again.

But, most change, is really good. As a food person, in order to keep it interesting and have content on a very regular basis, I’ve had to embrace new foods and cook things that I would have never made before. I’ve had to change the way I think about a lot of things.

Two truths I used to hold:

1. Shrimp is not a meal

2. I hate coconut

But, change is good. And recently I made:

Coconut Curry Shrimp (serves 4)

1. In a large pot on the stove top, whisk together:

  • Coconut Milk Whole Foods

    13.5 oz NOT 14oz

    1 14 oz can of Coconut Milk – unsweetened. For whatever reason, Whole Foods sells its 365 brand of Coconut milk in 13.5oz cans. Could be a marketing ploy and I fell for it and bought 2 – which was OK because I also made coconut rice…and, the 365 brand is very well priced.

    The recipe I tweaked also called for fresh coconut…but I draw the line there as I can’t stand crunching down on flakes of real coconut. So I left it out.

  • The juice from one lime
  • 1 1/2 tbsp curry powder
  • 1 tbsp of minced ginger – note, you can store ginger in your freezer for about one eon if you peel it first (use a spoon), wrap it in Saran and then put it in a ZipLoc freezer bag…frozen ginger is easier to grate as well – I used my Microplane grater
Ginger Root

Fresh Ginger Peeling Process

2. Slowly bring the mixture to a boil over low heat

Curry into the Coconut Milk mixture

3. Reduce the heat and simmer for about 7 – 10 minutes. The mixture will thicken and reduce a bit.

4. Add salt and pepper to taste – just a pinch of each will probably do ya

5. Add in 1lb of large, peeled and deveined shrimp. I know… I normally use frozen, but thought ‘Embrace Change!’ and bought a beautiful looking pound of fresh shrimp at Citarella.

coconut curry shrimp

Citarella Shrimp into the Curry!

6. Return to a simmer, then cover and cook for 12 – 15 minutes until the shrimps are fully cooked

Oh, they’re cooked now!

7. Toss in about 1/4 cup combo of freshly chopped parsley and freshly chopped basil

8. Serve over rice…I made coconut rice with orange peppers and peas – it was very pretty – much prettier than the picture above…Again, I left the flakes of fresh coconut out.

Like it? They LOVE it!

The coconut curry shrimp was really good. I liked it…A lot. And, so did these people.

Up is down. Black is white. Day is night. I eat coconut. Shrimp is a meal.

You know what, in my kitchen at least, there is hopey changey stuff that’s working just fine.

Change is good. We embrace change.

A Vegetable Peel Receptacle Miracle!

Russet Potatoes Pre-Peel

Chances are, if you’ve had any potato dish in my apartment that requires the potatoes to be peeled, you’ve eaten something that may or may not have fallen into the kitchen garbage can.

Some of these might not have been in the trash

Relax. Here’s what was happening…

I used to have a disposal…And, while I was told explicitly that the disposal was for scraps of food only…I often peeled vegetables right into the sink and then whirred the peels away in the disposal. Horrors right?

BTW, I also sent egg shells down there. And, while I might deny this…there may have been one incident when I broke a glass into the disposal and sent the shards into the spinning blades and away forever. Listen, I googled this before choosing between putting my bare hand into the blades vs keeping my fingers safe and just turning the disposal switch and I did find someone online to support turning the switch.

So, when I moved and no longer had a disposal, I had to readjust my approach to vegetable peeling. I tried peeling into the sink onto a paper towel – but that seemed a little messy and peels inevitably ended up on the drain. The use of the paper towel as receptacle wasn’t working to protect peels from causing a clog.

Small SimpleHuman Trash Can

I resorted to peeling vegetables directly into the trash. A few challenges arose. I have one of those super smart trash cans – you know the ones that lure you in at Bed Bath & Beyond because they’re

a. so prominently displayed

and

b. so pretty.

And, since my kitchen is NYC tiny, I have a small SimpleHuman semi-oval one. It’s only about 17 inches tall and I’m like a ton taller than that. So I have to bend pretty far down to create the right projectile for the veggie peels. Plus, my smart trash can isn’t smart enough to remain open while I’m peeling. I have to keep one foot on the lid opening pedal while peeling. It’s sort of a balancing act. SimpleHuman might want to create a ‘remain open’ option for exactly this type of thing. I’ll take a fee on that idea, thanks.

I’m also a little klutzy, to be honest. I can manage holding on to a carrot or a celery stalk when peeling directly into the trash. But, potatoes are slippery. Yes, to answer your next question, I’ve tried to peel toward myself as opposed to away – and that doesn’t work for me.

Were these in the trash?

And, sometimes, while thrusting the peeler against the potato, my hand has slipped and the half peeled potato has flown into the trash.

Before you get all crazy, I’m sure that I washed the potato before cooking it and serving it to you. Even in a perfect peel, you need to wash the peeled potato before serving. I know that.

But the other day while making the pot roast, I found a solution. So simple, the fact that I hadn’t thought of it before makes me the simple human in this scenario!

I took one of the many brown bags I have from Trader Joe’s and Whole Foods and propped it atop the SimpleHuman lid. Then, I slit the left and right sides about 8 inches down, creating a flap in front. I folded that flap down and created a perfect vegetable peel receptacle at a much better height.

Perfectly Positioned Veggie Peel Receptacle

I know you’re thinking, it’s a vegetable peel receptacle miracle! And, for me, it really is.

The paper bag solution, unfortunately doesn’t make me any less of a klutz. But, you all can now rest a little easier knowing that the potatoes I’m serving have only at worst been flung into a brown bag of vegetable peels.

Little Lies, Illusions and A Succulent Pot Roast

Pot Roast Plated and Ready

A good friend’s mother told him once that if he didn’t have time to clean his apartment before people were coming over, he could just use lower wattage light bulbs. In the dimness, guests would miss the dirt and dust. Makes sense to me.

Spanx

Little lies, illusions and cover ups surround us every day. I used to work for a shapewear company and our motto was always ‘fake it til you make it’.

I mean do you really think all those celebrities are cellulite-free? No. No they are not.

And the regular people? We’re all frantically double-Spanxing just to keep up. (note: I can’t believe that ‘Spanxing’ just passed my spell check!)

It’s cold out and slow cooker season is officially on. With the slow cooker, comes so many illusions. As prep is generally pretty easy and results are more than always pretty good – it can trick your guests into believing that you are a fabulous cook. They will think that you slaved for hours over the meal. That you reinvented cooking. You may literally change the way they see less expensive giant meats.

Annie’s Choice

I don’t have a slow cooker anymore – too big for small living. And when confronted with a Sophie’s Choice between my Le Creuset large dutch oven and the All-Clad Slow Cooker, I had to let the slow cooker go.

No worries. The dutch oven works just as well if not better.

So, it’s really slow and low cooking season at my place. And, last night I teased my neighbors with the warm wafting aromas of beef and herbs – providing the illusion that I was an amazingly fabulous chef, hostess and meat miracle worker.

Slow and Low Cooking Pot Roast (Serves 6)

Ina Garten-style with a few tweaks (some on purpose, some by accident and some because I had amnesia at Whole Foods)

Honestly, this is all about the prep…

1. Go to Whole Foods or similar and buy a giant, inexpensive piece of meat – 4-5lb boneless beef chuck roast. Ask the butcher to tie it as this will help keep it together during the slow roast. My butcher did this string pattern with just one piece of string!

Giant Meat from Whole Foods – Perfectly Tied

2. Mise en place your veggies:

Veggie Mise En Place to Make Anne Burrell Proud

  • 3 cups of leeks – it’s supposed to be just two but I forgot to buy onions so I increased the leeks
  • 2 cups chopped carrots – about 5 carrots
  • 2 cups chopped celery – about 4 stalks
  • 2/3 of a single onion chopped – because that’s all I had in my fridge
  • NOTE: these are going to be pureed, so don’t kill yourself chopping. Just try for somewhat similar size across all veggies.

3. Smash up 4 garlic cloves – Ina uses 5, but I was hesitant to do so. Would have been fine in the end

4. Mise en place your Kosher salt and freshly ground pepper. I didn’t do this, and it would have been real smart if I had. Put a teaspoon measure by them

5. Bundle 3 branches of fresh rosemary with 4-5 branches of fresh thyme

Herb Bundle

Muir Glen Tomato Puree

6. Open a 28oz can of tomato puree. The Muir Glen was on sale yesterday at Whole Foods – Yay!

7. Pour 2 cups of good red wine into a measuring cup. Ina uses Burgandy, I had some really good Montepulciano – 2 cups for the roast, 1 glass for me

8. Pour out 1 cup of chicken stock and open up a Knorr’s chicken bouillon cube

‘Cooking’ Cognac

9. Pour out 2 tbsp of either Cognac or Brandy. I had a pretty good cognac on hand – but that’s a story for another time

OK. That was the hardest part.

Pre-Heat oven to 325 degrees

10. Generously salt and pepper the giant meat on all sides and then dredge in flour. Ina uses a lot of salt (1 tbsp) I might use a little less next time.

11. In a large dutch oven, heat 2 tbsp of olive oil over med / high heat and sear the meat on all sides. Once seared (about 4 mins on each side) remove the meat and put on a plate

Searing the Giant Meat

12. Turn the heat down to medium – Add 2 more tbsp of olive oil to the pot and stir in all of the vegetables and smashed garlic. Add in 1 tbsp of salt and 1 1/2 tsp of pepper.

Cook over medium heat until tender – about :10 mins

Simmering Veggies Pre-Booze

13. Add the wine and cognac and bring to a boil

14. Once boiling, add in the pureed tomatoes, the chicken stock and the bouillon cube. Ina then adds 2 tsp of salt and 1 tsp of pepper…I’d skip the salt here as mine turned out pretty salty.

15. Throw the Thyme/Rosemary bundle in there and then add in the Giant Meat and bring to a boil. Cover and put into the oven.

Sauce Smothered Meat Oven-Ready

16. Bake for 1 hour and then turn heat down to 250 degrees and cook for an additional :90 minutes

17. Remove from the oven and take the roast out and put onto a carving board

18. Carefully ladle some of the veggies and sauce into a blender or Cuisinart and puree. CAUTION: allow to cool a bit before blending or it will blow the lid off of the blender. Just sayin’. Puree in batches until you have enough sauce.

NOTE: I didn’t puree the entire pot of goodness – didn’t need that much.

Veggie Booze and Sauce Puree

Also – Ina puts the puree back on the stove and does some magical adding of flour and butter here, but, really, you don’t need it. The pureed veggies and booze make a lovely sauce all on their own.

19. Slice the roast and serve over egg noodles covered with the sauce and some chopped parsley

In an apartment, aromas seep into hallways from everyone’s home. Some better than others. Slow cooking takes the aroma flow to a new level as the scents of deliciousness flow out of my kitchen for hours.

Last night even the doormen 14 floors below had heard from my neighbors that ‘Annie was cooking something amazing smelling all day’. Ah, but ‘all day’ in this case is really the illusion. For with very little work, you can produce an amazingly succulently, moist pot roast.

But, don’t tell anyone.