Pan Abuse: And the Schtick on Non-Stick

non stick fry pan care

Not so sticky

So….I’ve been guest cooking a bunch lately. (Read, cleverly escaping the cold and inviting myself to friends’ homes located in warmer climates – trading off home cooked meals and kitchen tips as currency).

On one such recent stay, I was at the home of a friend who had lost pretty much everything in a dryer fire – v dangerous those dryer fires, fyi. She and her husband had culled through their belongings and tossed what they deemed ‘unsalvagable’. Sux.

711 slurpees dinner fast food

Dinner

They don’t cook with any regularity. OK, they don’t cook at all. Not their thing. They both work full time, they have three kids (fab boys), 4,500 baseball games per week and then more on the weekends….yada yada yada. There’s a lot of pizza, pasta, mac & cheese, take out, slurpees, bagel bites (huh?), refrying, reheating, microwaving. You get it.

When it came time to assess their kitchen stuff post fire…well, most of what they had in their culinary arsenal, was as old as their marriage…but, had not fared as well, I’m afraid.

Some of the damage everything in their kitchen suffered was due to the fire. But, maybe more of it was due to years of use and abuse.

chicken milanese teflon pans

8-yr old sous chef!

Which brings me to their current frying pan situation. I was gearing up to make chicken milanese for them and their brood of boys  – 8, 12 and 14, so grown up…seems like just yesterday I was teaching them the diarrhea song.

Anyway…When I asked for a large fry pan, my choices were limited. If there were larger fry pans at one point in their world, those have long since been tossed or lost. My hostess with the mostest handed me two options:

  1.  a 10-inch non-coated fry pan
  2. a 10-inch coated fry pan…whose coating was tattered, flaking and torn
Teflon flaking pan

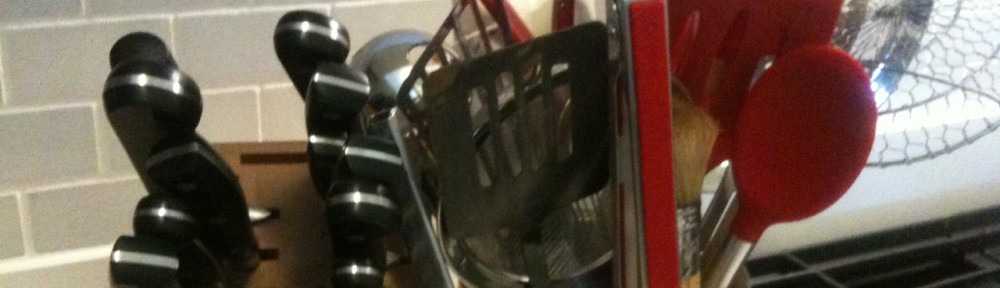
Abused Pan: So So Sad

So, I got to thinking about the care and feeding of non-stick pans and did some research on the Internets.

My my! People are passionate about Teflon. Seriously, very emotionally heated debates online. I found one woman who wrote an entire article about how the fumes emmitted from her teflon pans had killed her canaries. OK, if she says so.

Others cited sources from Wikipedia to NASA and research studies from Harvard to Stanford. There are usage guidelines, recommendations on what temperatures to cook at or below, how to store, how to recycle, which tools are OK to use on teflon pans, which are not, how to clean. There are literally thousands of blogposts, studies and articles with millions of tips, tirades and touts.

All that and still, I couldn’t really figure out if Teflon in and of itself kills canaries…

Here’s the Schtick on caring for Non-Stick.

  • Throw out your coated teflon pans that have suffered scuffs and scrapes from years of abuse. We don’t really know if you (or your canaries) will DIE if you accidentally injest a flake or two of teflon. But, do you really want to find out?

More importantly, once the teflon coating is compromised, the non-stick aspect of the pan is ruined. RUINED, I say. So, pitch the pan for this reason alone.

  • Do not use a metal spatula, but rather a rubber or silicone one – OK, I’ve used my fish spatula with a non-stick pan, but very very gently!
  • Do not put coated pans under the broiler or on a stove top set higher than medium..especially if you own small birds or other tiny pets that might inhale air contaminated with teflon particles – this is cited as the danger in exposing teflon to extreme heat
  • Do not put coated pans in the dishwasher…apparently, that too is bad bad bad for them
  • Put some paper towel or cloth between your pans if you stack and store like I do…it will keep them from scraping AND from making that clanking noise when you put them away or take them out.
  • Bear in mind that everything has a shelf life – sadly, even your pots and pans. So, evaluate the condition of the pots, pans, Santa Christmas lawn ornaments, giant salt and pepper shakers and whatever else you might have received as a gift from your first wedding. It may be time to toss these.

Toss and replace…but how?

macy's home goods one day sale

The 4-day 1-day sale is upon us!

Today I spent some time in Macy’s home section. It’s the preview to the preview of the 1-day sale that starts Friday and ends Sunday night. Plus, I had a 20% discount card and a $20 off card. AND, I went to the ‘closeouts’ room…a lovely woman told me about this secret and fabulous place.
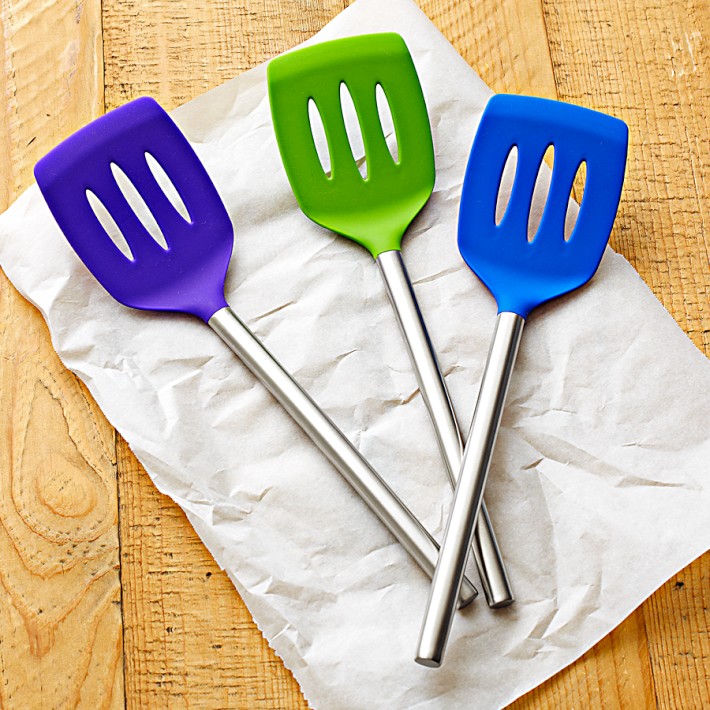
williams sonoma silicone spatulas

Gentle Spatulas

Inside the secret ‘closeout’ room, I found a two-frying pan, 10″ and 12″, non-stick, oven safe set. As a thank you for last weekend and a pre-thanks for this coming weekend…I’ll be hand delivering these to my pan abusing pals tomorrow. And, to be sure that these shiny new non-stick pans don’t meet the same tragic abuse as their predecessors, I’m also bringing my hosts a silicone spatula and the schtick on caring for non-stick.

Advertisement

Emergency Go-Soup: Cream of Tomato

amore tomato paste cream of tomato soup

Creamy and Delicious

My friends who live in LA sleep at night with an Earthquake Go-Bag under their beds. This includes heavy bottomed shoes (I think because LA gals sleep in stilettos), water, cash, canned food, flashlight etc. Everything they might need to evacuate quickly and survive for a few days following a devastating quake.

henri bendel emergency kit

Henri Bendel-Prepared for the NYC Emergency

Over the holidays at Henri Bendel they were selling NYC emergency kits. Similar to the California quake kit…only very different. Instead of canned beans and a flashlight, it includes a metro card, hair bands, breath freshener, bandages, deodorant towelettes, pain relievers and some other girl stuff…

I’m not really sure what our emergency kit vs the CA one says. Maybe in New York waking up smelly, gently wounded and needing to take the subway constitutes an ’emergency’. It might. It’s no earthquake, but it is an emergency and Henri Bendel has the solution.

For people who cook, that go-bag or emergency kit translates to a go-meal; one that is ready to serve with very little notice…

At about 6pm on New Year’s Eve after a champagne boozy lunch, my friends decided that they would come over to my apartment for dinner. OK. I had :65 minutes to prepare for the arrival of hungry guests.

dinner party main course chicken

Chicken Milanese

I went to my go-to’s and quickly shopped for what I would need to prepare Chicken Milanese, salad, garlic bread, pasta…

And, luckily, I had a go-soup in my fridge. The day before I tweaked an Ina Garten recipe and made…

Cream of Tomato Soup (serves 6-7)

Ingredients

  • whole foods vegetables

    Chopped Veggie Mise En Place

    3 TBSP olive oil

  • 1 Red Onion Diced
  • 2 large Carrots Peeled and Diced
  • 1 Sweet Potato – peeled, diced and roasted
  • 2 Cloves Garlic Minced
  • 6-7 Medium vine-ripened tomatoes Chopped
  • 1 TSP Sugar
  • 1/2 TBSP Amore Tomato Paste
  • Ina garten tomato soup

    365 Brand Chicken Stock

    1/4 Cup Chopped Fresh Basil Leaves

  • 3 Cups Chicken Stock – I used Whole Foods 365 Brand – I know I know, I should make my own…but didn’t
  • 1/2 TBSP Kosher Salt
  • 1 TSP Freshly Ground Pepper
  • 3/4 Cup Heavy Cream at room temperature

Preheat the oven to 425 degrees

1. Heat the olive oil in a large pot over medium/low heat. I used my Le Creuset 6 qt one – it’s just so pretty and so easy to clean!

2. Add the onions and carrots and saute until very tender – be patient, this takes a while – :15-:17 mins.

– In hindsight, I would have chopped the carrots smaller so that they might soften more quickly.

whole foods vegetables

Patiently Sauteing

3. While that’s happening…Place the diced sweet potatoes on a sheet pan lined with Reynold’s Wrap Pan Lining Paper in one layer and sprinkle with olive oil. DO NOT SALT.

sweet potatoes super food

Super Sweet Potatoes

4. Put in the oven and roast for :10mins – Toss and then roast an additional :05-:07 mins until tender. Remove from the oven and set aside.

whole foods sweet potatoes

Roasted – but not browned

5. Into the Le Creuset – Add the minced garlic to the softened onion and carrots and saute until fragrant – about 1 minute

6. Add the tomatoes, roasted sweet potatoes, sugar, tomato paste, basil, chicken stock, salt and pepper and stir well.

whole foods vegetarian

And the soup becomes soupy

7. Bring the soup to a boil, reduce to a simmer and cook uncovered for :40mins – until the tomatoes are very tender

cream of tomato soup

Simmering Simmering Simmering

8. Add the cream to the soup and stir

9. If you have an immersion blender…great…But since I don’t – I set up a blending station by the stove on my counter

NOTE: Ina used her food mill…but, seriously, in my apt – no room for a food mill.

cream of tomato ina garten

Soup Blending Station

10. Most importantly…LET THE SOUP COOL before blending. Cuz like if you put hot soup in a blender and turn it on, it will blow the top off and there will be quasi blended hot soup everywhere…

11. In stages, ladle some of the soup into the blender and puree until smooth.

kitchenAid blender

Pre-Puree

12. Transfer the pureed soup into a second soup pot and keep warm

cream of tomato soup ina garten

A few ladles at a time

13. Repeat until all of the soup is smooth and creamy

cream of tomato soup

Kick it up a bit…

NOTE: If you like it spicy….Add a dash or two of Gindo’s Spice of Life Fresh and Spicy Pepper Sauce.

The soup was a great intro to the Chicken Milanese. And, with my ‘stick your head out the window-view’ of the Central Park fireworks and the impromptu late night dance party…The last-minute dinner party was a success.

I don’t have much of a need for the Henri Bendel NYC Emergency Kit because – and I’m not judging – I don’t tend to wake up slightly wounded, smelly and not at home…but a good batch of emergency go-soup in the fridge does come in handy.

Good Friends, a Beautiful Garden and Veal Milanese

True friendships are rare treasures that withstand the test of time and distance. This past weekend, eight of my friends met for a girls’ weekend in New York.

The arrivals began as early as Thursday afternoon and the departures started at 6am Sunday morning.

Over several great meals, we caught up on now and reminisced on then. Mostly, there was a lot of laughing, a lot of drinking, a lot of eating and a little singing. Only two of us live in New York. The rest traveled from Los Angeles, Vermont, Boston. and Connecticut.

The restaurants ranged from uber chic to dirty diner. From downtown to the upper west side. And while not the trendiest, I was most happy to share with my friends my favorite neighborhood Italian restaurant, Bello Giardino. The place isn’t much to look at from the street – a small store front just east of Columbus Avenue on 71st Street. The Tuscan themed dining room is just down a few stairs. It’s clean and well-lit and unlike so many restaurants, the tables aren’t crammed together. The owner, Nick, is always there to greet his guests at the door.

None of that separates it from the 1,000 or so small Italian places in New York. But, when you pass through the restaurant, by the kitchen and the restrooms, there is a beautiful garden underneath a canopy of grapevines. It was about 1,000 degrees and muggy Saturday night, but the nine if us sat centerstage at a table in the secret back garden.

I always order the same thing….Veal Milanese. It comes with a side of Bow Tie pasta and instead of the traditional marinara sauce, I ask for the vodka sauce – best in town.

I’ve tried to mimic this at home…here’s what I do….

Veal Milanese

–     4 thinly pounded veal cutlets

·      Panko bread  crumbs – about 1 1/2 cups – 2 cups

·      1 tsp Italian Seasoning – or any combination of dried oregano, dried thyme, dried rosemary, dried sage
·      1 tablespoon Dijon Mustard
·      2 Eggs
·      1 cup all purpose flour
·      Extra Virgin Olive Oil
·      2 tablespoons Butter
·      Two Roma or small tomatoes diced
·      Arugula – two handfuls
·      Lemon
·      Salt and Pepper
Directions:
 
1.   Heat a large skillet over Medium-High heat with a 3-count of good olive oil and 2-3 tablespoons of butter
2.   In three bowls, prepare your breading:
      a.   Bowl one – 1 cup of all purpose flour
      b.   Bowl two – mix together 2 eggs beaten + 1 tablespoon of Dijon mustard
      c.   Bowl three – mix together 2 cups of Panko breadcrumbs + 1 teaspoon Italian Seasoning
3.   Pat the veal cutlets dry and season both sides with salt and pepper
4.   Dredge each cutlet first in the flour, then in the egg/mustard mix, then in the panko/italian seasoning mix
5.   Once the Olive Oil is shimmering in your skillet, add the breaded veal cutlets and cook about 4 minutes on each side.
6.   While the cutlets are frying, chop the arugula and combine with the diced tomatoes and the juice of ½ lemon. Set aside
7.   Remove the fried cutlets from the skillet and plate with a generous serving of the arugula / tomato mixture served on top
Note:         If you like spicy foods….you can add a dash of hot sauce to the egg/mustard mixture or use a spicy mustard
         You can also add sliced red onion to the arugula/tomato mixture

Ultimately, it didn’t matter where or what my friends and I ate. Through a quiet restaurant, down a narrow hallway, there’s a door that leads to a beautiful, Tuscan garden. I have known these amazing women for 30+ years. Our friendships endure because each of us sees in the others her own Bello Giardino. Maybe Stephen King said it best, “I never had any friends later on like the ones I had when I was twelve. Jesus, does anyone?”