If At First You Don’t Succeed: Pie Pie Again

grey goose pie crust

Vodka Infused Pie Crust

Perhaps the only thing uglier than my handwriting, is my pie crust. So, don’t expect a lot of pictures in this one…

I watch a good number of cooking programs and am always in awe of the ease with which Ina or Giada or Melissa D’Arabian rolls out a perfect pie crust. ‘How Easy Is That?’ Ina always says as she places the perfect crust into the pie pan. Each of them assured me that making my own pie crust would be a much better option than buying a store bought one in my grocer’s freezer.

Challenge really is that I don’t like pie. I’m not a baker. I’m not a sweets eater or much of a fruit eater. I do, however, enjoy a good pie crust – it’s like bread, my favorite food group. During the holidays, I’m the person who picks around the apples in the apple pie and dips pieces of crust into the gooey filling. I’m the person who sneaks into the kitchen and pulls a piece of the crust off of a cooling pie.

But, I’m up for the challenge. And, so I spent some time researching the perfect pie crust recipes.

This is a combination of a few recipes that I found online. And, it really wasn’t hard…until I had to roll it out and carefully place it into my makeshift pie pan – this is where I had to Pie Pie again.

Perfect Pie Crust (makes 2 crusts – theoretically for the top and bottom of a pie…or, in my case, one for the bottom of an open-faced pie, one for ‘practice’)
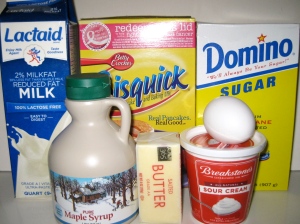
Ingredients:

  • Grey Goose Vodka infused pie crust

    Yay! Vodka!

    2 1/2 Cups Gold Medal All-Purpose Flour

  • 1/4 TSP salt
  • 2 TBSP Sugar
  • 12 TBSPs Cold Butter – cut into 1/4 inch slices
  • 1/2 Cup Cold Vegetable Shortening – cut into 4-6 pieces
  • 1/4 Cup Cold Vodka (Yay! Vodka! I don’t drink it anymore – that’s another story –  and it evaporates – so this is AOK for all)
  • 1/2 Cup cold water
vodka infused pie crust

Butter Makes it Better

1. Take the butter and cut it into 1/4 inch slices. Cover and put into the freezer for :10mins or into the fridge for :30 mins

2. Measure out the food shortening (I used Crisco…is there another kind?). And place into the freezer for :10mins or the fridge for :30 mins

3. In the bowl of a food processor, Pulse 1 1/2 cups of the flour, the salt and all of the sugar until combined – about two quick pulses

vodka infused pie crust

I heart my Cuisinart

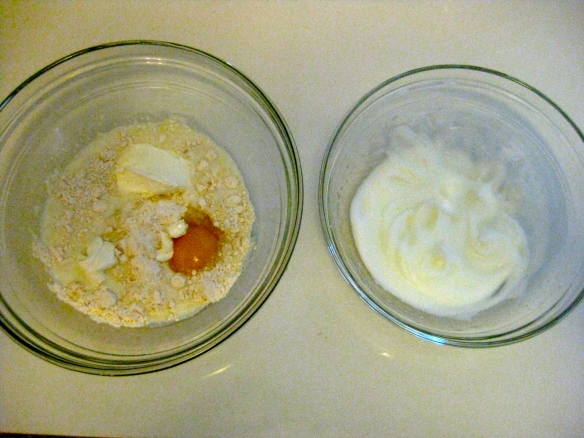
4. Add the butter and shortening and process until a dough begins to form and cottage cheese looking curds appear

vodka infused pie crust

Food Shortening Kinda Grosses Me Out

5. Scrape down the bowl and add the remaining flour – pulse just until the mass of dough has been broken up

6. Empty the mixture into a bowl

7. Sprinkle the water and the vodka – I used Grey Goose, cuz that’s what someone recently brought over

vodka infused pie crust

Pie Crust Gets Drunk

8. Use a spatula to carefully fold the water and vodka into the dough until both are completely absorbed. Don’t over mix!

vodka infused pie crust

Carefully fold in the booze and water

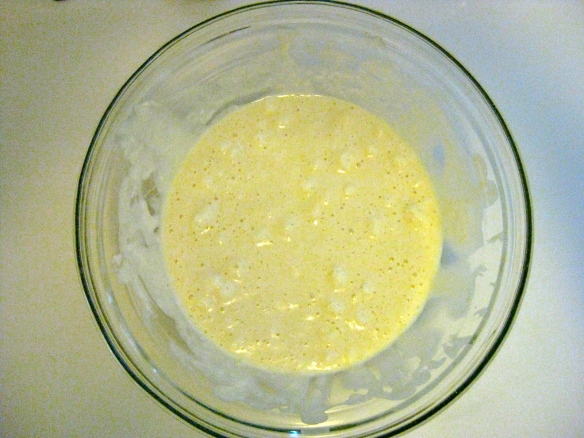
9. It’ll be super tacky…Divide the drunken dough in two, make two balls of dough, flatten each and wrap each in plastic

10. Put the flattened balls of drunken dough into the fridge for at least an hour and up to 2 days

Baking the Pie Crust for an open faced savory pie:

Here’s where my creative abilities were truly challenged…and, I lost.

OK, I don’t like sweet pie, so decided to make an open-faced veggie filled pie for my vegetarian friends who came to dinner last night. Luckily, that meant I only needed one of the pie balls. Good news, because I failed the first time I tried the following:

Pre-heat oven to 425 degrees (that part I did perfectly!)

1. Remove one of the drunken pie balls (sounds dirty, isn’t) from the fridge and allow to warm up for a few minutes – not too long, just until the dough can be safely rolled out

2. Place one ball on a large piece of Saran wrap dusted generously with flour

grey goose infused pie crust

Still Hopeful At this Point

3. Place a large piece of parchment paper on top of the pie dough

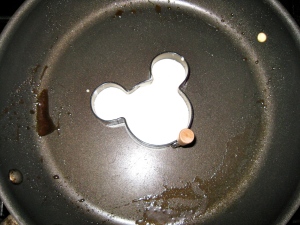
4. Roll the pie dough through the parchment paper into a circle large enough to line the pie pan. I don’t have a pie pan…and really don’t need one…so I improvised with my round glass baking dish.

5. Try to carefully place the rolled dough into the makeshift pie pan. FAIL horribly. Mold that dough back into a ball, cover in Saran Wrap and put back in the fridge

6. Pie Pie again….Remove ball #2 from the fridge and repeat steps 1 – 4: This time, carefully roll the rolled out dough onto a heavily floured rolling pin and unfurl the dough from the rolling pin gently into the makeshift baking dish – much better

7. Cover the baking dish (or pie pan) with plastic wrap and refrigerate for at least an hour

Shop online, clean the apartment…whatever

8. Remove from the fridge, cover the dough completely with parchment paper

Ceramic pie weights

I bought pie weights!

9. Place pie weights into the base of the pie dough and ‘blind bake’ for :20 minutes. You can apparently also use dried beans as pie weights…but, I don’t have a giant bag of dried beans (small apartment, remember?)

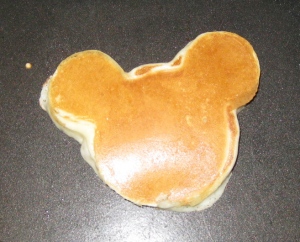
9. After :20 minutes in the oven, remove the pie weights and parchment paper, pierce the bottom of the pie crust with a fork – like a whole bunch of times to keep the pie crust from puffing – and bake for another :05 – :10 minutes until the crust is a light golden brown

reynold's wrap drunken pie crust

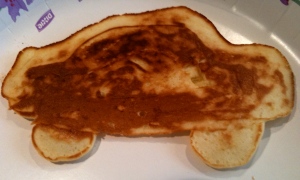
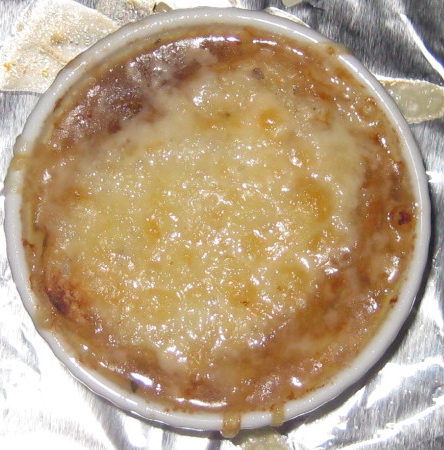
Not Pretty, But Delicious!

10. In the second baking, I foil wrapped the edges of the pie crust to keep them from burning

And….your drunken crust is prepared for filling!

I gotta say, the pie crust was delicious – light, flaky, no vodka taste. It provided the perfect vessel for an open-faced veggie pie. (recipe tomorrow)

Of course it wasn’t as easy as Ina had assured me. But, thank goodness for a do-over…Cuz, in this case, after a first fail, I had to Pie Pie again…

Magic Pancakes: Made With Love

pancake bisquick breakfast

Picture Perfect Pancake

When for a brief time I lived outside of the city, there was a chicken dish I made all the time – very simple, easy and because I could use the frozen Perdue chicken breasts…always available in my freezer. I referred to this very basic but delicious dish simply as ‘The Chicken’. Like ‘Hey, what’d you have for dinner last night?’…’The Chicken’.

Someone once asked me why when I made ‘The chicken’ it tasted so much better than when he made ‘The Chicken’. And, I always told him the same thing: because I make it with love.

Cooking isn’t as simple as just following the directions. I’m not saying it’s hard. I am saying that you can always taste the difference when something is made by someone who loved making it or loved the idea of eating it.

The ‘Love Ingredient’ may not always be tangible but it is always detectable. Love heats the bread in the bread basket. Love makes the perfectly runny poached egg. Love cares enough to whip up real whipped cream.

And, sometimes, the love is in the extra ingredients and care in creation. When it comes to pancakes, I like them crispy, fluffy, light and creamy. Hard to achieve this using just a simple mix…Or, God Forbid – a prefab batter…

So, I do a little love doctoring to make them magic, to create the ideal pancake. Not a lot of work…just a little bit of love.

Magic Pancakes: Made with Love (Serves 2 – 4)

Ingredients:

Perfect Pancakes

Magic Pancakes: Mise En Place

  • 1 Cup Bisquick Baking Mix
  • 1/2 Cup milk – Yes, skim or 2% or whole milk are all fine.
  • 1 TSP Sugar (Crispy Love Creator)
  • 1/3 Cup Sour Cream (Creamy Love Creator)
  • 1 Egg Yolk
  • 1 Egg White – Whipped to stiff peaks (Fluffy Love Creator)
  • Grade A Pure Maple Syrup
  • Butter

1. In a mixing bowl, combine the Bisquick, Milk, Egg Yolk, Sour Cream and Sugar with a whisk

light and fluffy crispy pancakes

Pancake Batter To Be Combined

cuisinart hand held mixer silver

Magic Mixer

2. In a separate bowl, whip the egg white to stiff peaks. Love separates the egg and whips the egg whites. You can do this by hand…but, it’s a little more love than you might have. I like to use my Cuisinart hand mixer.

3. Fold the whipped egg white into the Bisquick/Milk/Egg/Sour Cream/Sugar batter. Fold it in carefully so as to not deflate the fluffiness

light and fluffy pancakes

Don’t Over Mix!

4. Heat a skillet over medium and melt a just enough butter to ensure the pancake won’t stick. But, you don’t want a visible layer of butter.

5. Pour the batter into the heated skillet in 3 inch circles…Or, into a Mickey Mouse mold or freehand the shape of a car

walt disney world pancake mold

Pancake Fun Shape

bisquick pancakes

Freehand Pancake

6. Cook until the edges are dry and bubbles start to form on the top then flip

mickey mouse pancakes

Mousy-Cake

7. Cook another :30 seconds. Once the pancake fluffs up and is dry on the edges, it’s ready

8. Serve a stack with heated syrup and a little more butter. Love uses real maple syrup and heats it up.

pancakes light fluffy crispy

Heated Syrup and Just a little butter make it better…

With Christmas just around the corner, you may be having guests of all ages who would enjoy a carefully prepared pancake. Here’s just one way to show them you care: Make your pancakes with a little love.

The Other Kind of Spicy: Spicy French Onion Soup

Gindo's Hot Pepper Sauce French Onion Soup Melissa D'Arabian recipe dinner appetizer

A Twist of Spice: Spicy French Onion Soup

The other day I read an article or – ok, let’s be honest – saw something on TV – about how quickly the spice can fade out of a relationship. One very important authority – ok, it was Dr. Oz (but if it’s good enough for Oprah, it’s good enough for me) estimated that the spice is gone within three years. He went on to say that the only way to stay in a relationship is to continue to spice things up.

Dr Oz

Dr. Oz Knows Stuff

Something to think about. But, since this isn’t ‘that kind’ of blog – we’ll leave that type of spicing up and talk about the benefits of eating spices instead.

And, luckily, Dr. Oz talks food spices and herbs as well. Cayenne pepper, for example, can boost your metabolism and help you lose weight more quickly. Ginger and mustard have a similar effect.

french onion soup with thyme

Thyme

There are also herbs and spices that as per the good Doc, can help you combat aging and fight against disease and make you smarter.

One of my favorite and not too crazy of herbs, Thyme, can help you fend off MRSA and is used in mouthwash to help treat throat inflammations and in cough drops to fend off throat infections.

I’m not a huge fan of the super spicy – again, we’re talking edible spices, this is a food/food stories blog after all. I mean, I have been accused of being sassy and maybe even a little bit saucy…but no one has every called my cooking too spicy. I try to include spices and flavors that will please all my reader(s). Like, even though I don’t love garlic (and neither does Ina, btw), I will include almost the entire directed amount prescribed by a given recipe…Ok, to be honest, I usually sub out 1/2 the garlic and replace it with a sweet shallot. I’m trying.

But, it’s time…and I’ve decided to step out of my comfort zone and try to spice things up a bit.

And, as per Dr. Oz, I may be getting thinner AND healthier at the same time!

Spicy French Onion Soup (serves 2-4)

  • Gindo's Spice of Life pepper sauce

    Metabolism Speeders

    1 TBSP Butter

  • 2 Medium Sweet Onions sliced thin with the grain – so you have onion strips. I had to stare at the onion for like a long time to figure this out…
  • Salt and Pepper
  • 1 TSP Flour
  • 1/3 C of Red Wine
  • 1 TSP Fresh Thyme
  • 1 TBSP fresh Lemon Juice – really good add by Melissa D’Arabian who recommended just a teaspoon. So good an idea that I added more!
  • 1 Bay Leaf
  • 1/2 TSP Gindo’s Red Pepper Sauce
  • 1 1/4 C Beef Stock – I use Kitchen Basics because it comes in the smaller sizes and I didn’t need a 33oz box
  • 1 1/2 C Chicken Stock
  • 1/2 C Grated Swiss Cheese – if you’re feeling fancy, get gruyere…but it’s pricey and the Kraft shredded swiss is also good
  • 1 – 2 TBSP Grated Parmesan Cheese
  • 1 Baguette Slice for each bowl of soup. Sliced about 1/2 inch thick and lightly toasted. I buy the petite baguettes at Food Emporium…But, really, you could just toast up any hearty bread you might have on hand…

1. In a large saucepan – I used my 4qt All-Clad soup pot with the copper core – because I love it – melt the butter over med/low heat

2. Stir in the onions, add salt and pepper and cover

Onions in butter!

Onions in butter!

3. WAIT – like forever – though get in there and stir them around every :15 mins or so

4. After about :90 mins, the onions should be a lovely brown and caramelized. If they’re not…send a tweet to Melissa D’Arabian and ask her for tips to speeding the process. She will tweet you back ‘Time :-)’. So, I gave it more time.

twitter melissa d'arabian

Thanks, Melissa D’Arabian!

5. Once the onions are caramelized, turn up the heat to medium and stir in the flour….cook for about a minute or so.

melissa d'arabian spicy french onion soup

Caramelized and Floured

6. Add in the wine to deglaze the pan. Use a wooden spoon to scrape all of the oniony-goodness from the bottom of the pan

7. Add in the thyme, lemon, a bay leaf….And, this is where I got all spicy…the Gindo’s Fresh and Spicy Pepper Sauce – I used the red one, but either the green or red will do here.

8. Add both the beef stock AND the chicken stock, stir and bring to a boil, reduce to a simmer (BTB/RTS)

spicy french onion soup

BTB/RTS

9. Simmer for :10 mins

10. Ladle the soup into 2 – 4 sassy french onion soup bowls….Or, in my case, an oversized ramekin. (note, if you are thinking of Christmas gifts for me and want to try this soup..well, you know)

11. Top the soup with a single slice of the toasted baguette

12. Top each baguette with a heap of the swiss cheese and a sprinkle of the parmesan cheese

spicy french onion soup

I like cheese…

13. Put the soup bowls on a rimmed baking sheet and into the oven on Full BROIL

14. Broil just until the cheese is cheesy – bubbly and beginning to brown

Serve while piping hot…and spicy!

I’m not a big fan of the spicy foods. And, people who douse their meals in hot sauce have always baffled me…I mean, how can they really taste what’s going on when it’s overpowered by hotness?

But, it’s good to step out of your comfort zone once and maybe more than once in a while and spice things up a bit. And, listen, if it’s making me thinner AND fighting off a sore throat…I’m like totally in and willing to give the other type of spice a try.

Talkin’ Turkey in a Tiny Kitchen

norman rockwell thanksgiving

This MIGHT not be your family

OK. So I realize that as a blogger of food  (and stories) it might make sense for me to dazzle my audience this week with spectacular Thanksgiving recipes. But, really, all of the food bloggers are doing that already for you…And, I can even bet you’d be hard pressed to avoid seeing or hearing at least one (but most likely dozens more) shows, specials, series, tweets and posts about the best way to make each and every dish traditionally and maybe even not so traditionally served at Thanksgiving.

What I think I’ll do instead is lend you some of the learnings I’ve accumulated since I started making the Thanksgiving meal as a sophomore in college…I’ve suffered through Thanksgiving with one oven and a party of 12 and have been fortunate enough to have two…This year, I’m down to one again, so every hint below helps!

  1. Shopping: Make a list. Like a real hard thought out list
  2. Shopping: Categorize the list by grocery department or aisle (like ‘Produce’, ‘Meat’, ‘Dairy’ etc) Is this anal? Yes, but it will save you a lot of time and keep you from doubling back in the store.
  3. Get extra potatoes, onions, celery, carrots and fresh herbs – you might want to put some cut veggies in the bottom of the roasting pan to help flavor the bird and the pan drippings and by might I mean you will.
  4. Get extra chicken stock. You might need it for your stuffing. You might need it for your gravy. You might need it to rehydrate your bird if, gasp! you over cook it and it’s dry. A good trick for a dry bird is to pass each piece through some warmed chicken stock before serving.
  5. If you can get a free-range bird, do…No, it probably won’t have a pop out thingamajig to tell you when the bird is done, but those things don’t really work anyway. And, no, it won’t be injected with butter and fed fat only…But, we’ll fix that too.
  6. Articles will advise you to buy a bird that is equal in weight to one pound per person…Yeah, but that’s just not enough. A 10lb bird is the smallest you might ever want to consider. I would recommend getting no smaller than a 12lb bird for a party of 6. Let’s face it, one of the best parts of Thanksgiving is the left overs. Plus, you may not know who wants light and who wants dark meat.
  7. Brine the bird

    Family Fun! Bird Brining

    Brine the bird (see how we’re fixing the non-butter injection issue). It’s a fun family activity for the night before and, believe me, makes a big difference. The big grocery stores sell very affordable brining kits that include the mix and the bag. You can also and very easily make your own brine with just a ton of salt, brown sugar and some herbs heated and dissolved in water, cooled and poured over your bird. 10 –  24 hrs in the fridge and voila, brined bird.

    Note: you will need to keep the bird cold overnight during the brining and will need space in your fridge or another plan. Last year we put it in a large cooler and left it outside BUT put a very heavy rock on top of the cooler so that animals couldn’t get in and eat our feast!

  8. OK. The Bird… The bird has bags of stuff in the bottom and top cavities. The top cavity bag usually has the gizzard and the bottom bag usually has the heart, pancreas and other creepy organs. You can put these in a pot of chicken stock over low with some herbs (a bay leaf and maybe some rosemary) and simmer until cooked through. The simmering organs actually make the kitchen smell like Thanksgiving…And some people cut this stuff up for their stuffing, others give it to an odd relative who eats it as is…It’s your call
  9. laura ingalls

    Good Enough for Half Pint

    Stuff the bird. Yes, there are health hazards. But if it was good enough for Laura Ingalls, it’s good enough for me. Plus the stuffing in the bird is sort of the best stuffing ever because it soaks up the juices while cooking. Just be sure to rinse the bird out completely and salt the inside before stuffing.

  10. OK Stuffing…You don’t have to get fancy, but it’s always good to add a personal touch. Personally, I use a mix of the Pepperidge Farm stuffing in the blue bag with cubed, staled white and wheat bread and pretty much follow the directions on the package. BUT, I add morel mushrooms – the bacon of the mushroom family. I buy them dried and rehydrate in chicken stock for additional flavor. I then slice them into small rings and add them to the onions, celery and rosemary, butter mix before mixing with the breads…delish!
  11. Thanksgiving butter

    Butter Trot to the Mobil Station

    Have enough butter on hand. Just when you think you have enough, buy just a little bit more. You don’t want to have to make the annual turkey day butter trot to the only open store on the morning of. Also you may want to dot the top of any premade dish (the stuffing that didn’t fit in the bird, the sweet potato pie, puree, the green bean casserole) with butter to keep it hydrated when you reheat it.

  12. Plan to eat at 5:30 or 6:00pm…It’s dinner, not lunch people! Plus that gives the chef enough time to get everything ready AND shower before all of those guests arrive.
  13. Whatever time you decide to serve, create a timeline (like write it down) and work backwards. So create a timeline starting from when you want to eat and include how long the bird should rest (at least :30 mins) once it’s out of the oven, how long your knife wielding brother/husband/father/aunt/cousin will take to carve it, how long the last minute items like mashed potatoes take to make, how long the other pre-prepared dishes will need to reheat etc…
  14. Set the table the night before and really think about where everyone should sit. Some of your guests might not want to sit next to others, or am I the only one?…think about it
  15. While setting the table the night before, include all serving bowls/platters you will need. Into each, put a label or a hand written piece of paper to denote what each will hold. Yes, again, this is anal…but helpful – for reals.
  16. Ask people to bring dessert. Unless this is your thing, dessert will just crowd your fridge and will be one more thing for your to worry about. Plus, people like to bring stuff.
  17. Ask people to bring wine. No explanation needed.
  18. Make what you can ahead of time…A sweet potato casserole or puree can be done days before for example
Roasted Turkey perfect

It’s Ok if your turkey doesn’t look like this…

Most importantly, RELAX. Give yourself a break. Your turkey might not look all Norman Rockwell. Your guests might not all love each other. Your dinner might be a few minutes late…

That’s not the point. It’s Thanksgiving. Be thankful. And, enjoy.

Improvisations: No Rolling Pin? No Problem.

Paula Deen Beef Wellington's

Thank you Paula Deen!

A Chorus Line

Best. Musical. Ever.

When I was young, A Chorus Line was my favorite play. After school my best friend and I would stand proudly on the ledge of her large bay window and belt out songs from the show for our audience – her parents. Imagine her very catholic father’s surprise as we belted the lyrics to ‘Tits and Ass’ out of our 12-year old mouths.

In seventh grade, I auditioned for the school play with the character Morales’ song ‘Nothing’. In the song, Morales is learning how to do improvisations ala: ‘now you’re on a bobsled, it’s snowing out and it’s cold…OK Go!

I never hesitated about the words and delighted the director as I sang ‘I felt nothing except the feeling that this bull shit was absurd!

I got a small part and the shock of my peers.

This past weekend I learned even more about improvising.  I was upstate at a friend’s home. We were hosting a dinner party for 12 – in part because another good friend was visiting from San Francisco (please don’t call it ‘Frisco’) and also so that our group could meet the host’s new boyfriend.

At the host’s request, I agreed to make Paula Deen’s Individual Beef Wellingtons in a Sherry Cream Sauce. Even though I’ve made the wellies a dozen times or so, I’ve had to improvise each time for one reason or another.

  • I couldn’t find the right pastry
  • The supermarket had no baby bella mushrooms
  • I was cooking for 4 not 12
  • This oven is too hot or not hot enough

This past weekend presented yet another improv challenge – ‘You’re making wellingtons, you have to roll out pastry dough, you don’t have a rolling pin. OK Go!

Individual Beef Wellingtons in a Sherry Cream Sauce (serves 12)

Note…After making this so many times, I think with the sequence of steps below, I’ve finally found the best way to ensure that dinner is deliciously delivered to the table on time.

Ingredients for the wellies, sauce ingredients to follow:

  • 12     1 1/2 inch thick beef tenderloin fillets
  • 2 tsps salt
  • 1 tsp ground pepper
  • 4 tbsp butter – it’s Paula Deen after all
  • 2      8 oz packages of baby bella mushrooms minced – Improvisation: I bought 2 10oz pkgs of pre-sliced shrooms at Trader Joe’s – $1.99 each! Math isn’t my thing and I just used most of the mushrooms, not all.
  • 1 large shallot minced – Improvisation: I used 2 smaller ones
  • 1/3 cup dry sherry
  • 1/4 cup heavy cream – again, it’s Paula Deen just go with it
  • 2 tbsp chopped fresh parsley
  • Dufour Puff PastryThe recipe calls for 2 packages of 17.3oz frozen puff pastry (aka: Pepperidge Farm) But..Improvisation: I used 4 packages of Dufour Puff Pastry Dough – they carry this at Whole Foods and it’s worth every penny of the $11.99 per package.
  • 2 large eggs lightly beaten – I needed 3

Here are a few things you need to know before you start:

  • minced baby bella mushrooms

    Shrooms & Shallots Mise En Place

    There’s some chopping – mincing of the shallots, mushrooms and chopping of the parsley take time – prepare ahead

  • The meat needs to chill for at least an hour after you sear it – don’t start cooking at 5pm for a 7:30 dinner. Actually, I usually sear the meat and make the filling the night before
  • The puff pastry is frozen – you will need to either thaw by putting in the fridge the night before, or you can take it out :40mins to an hour before you need it, unwrap it and thaw it on the kitchen counter
  • The sauce takes about :40 minutes – you can make the sauce while the meat is chilling and just reheat it when you’re ready to serve.

1. Sprinkle the fillets on both sides with 1 tsp of salt and 1 tsp of pepper. In a large skillet, melt all 4 tbsp of butter over med/high heat

butter

mmmmm….butter

2. Add the fillets (probably in batches as I’m guessing you might not have a skillet large enough for all 12 at once) and sear on both sides – about 1 1/2 mins each side

Searing the Meat – One side done

3. Put the seared meat on a tray, cover and chill for at least an hour in the fridge

CREATING THE Wellington filling…AKA The YUMMY GOODNESS

4. In the same pan, in the meat juices, add the mushrooms and shallots and cook over med/high heat for 3 minutes stirring occasionally

Baby Bella Mushrooms

Shrooms & Shallots

5. Add the sherry, cream, parsley and 1 tsp of salt. Cook, stirring frequently until all the liquid is absorbed – this takes about 12 – 14 mins

baby bella mushrooms Trader Joe's

The Yummy Goodness

baby bella mushrooms trader joe's beef wellington filling

Yummy Goodness Complete

6. Put the yummy goodness in a bowl, cover and refrigerate

————————————————————————

Use the chilling time to: Make the Sherry Cream Sauce

Ingredients:

  • 3 tbsp butter
  • 4 cloves of garlic minced
  • 1/4 cup of flour
  • 2 cups of beef broth
  • 1/2 cup of dry sherry
  • 1 cup heavy cream

Sauce 1. In a medium skillet over medium heat, melt the butter….Add the garlic and saute 3 minutes

Sherry cream sauce

Saute The Garlic

Sauce 2. Add the flour and cook, stirring constantly for 2 more minutes to cook out the floury taste

creating a roux

Creating the Roux

Sauce 3. Whisk in the broth and sherry…BTB / RTS (bring to boil, reduce to simmer) and simmer for :10 mins

Adding the beef broth

Beef Broth & Sherry & Boil

Sauce 4. Whisk in the cream and simmer another :20 mins. The sauce is very thick even without the cream…so, you can skip the cream or add a lot less – but, at this point, you’ve already soaked the meat in butter, so why not add the cream?

heavy whipping cream

Just add the cream

Sauce 5: Transfer the sauce to a small sauce pan and cover to keep warm

————————————————————————

Back to the Wellie Assembly

Preheat the oven to 425 degrees and line two rimmed baking sheets with parchment paper

7. Roll out 1 puff pastry sheet to about 12x10inches and cut in half

NOTE: if you don’t have a rolling pin – Improvise…We used a washed and floured Diet Coke can – Oh! The irony!

Diet coke can

Rolling Pin

8. In the center of each half pastry sheet, place a heap of the yummy goodness and gently press down to about 1/4 inch thickness

baby bella mushrooms beef wellington filling

A Heap of Yummy Goodness

9. Place a seared fillet on top of each heap of yummy goodness

10. Paint the edges of the pastry with the beaten egg

paula deen dufour's puff pastry

Painted Edges

11. Pull up the corners of the pastry over the meat and seal with additional beaten egg

12. Flip the meat package over and place on the rimmed baking sheet

13. Repeat until all 12 fillets are wrapped

14. Brush each package with the beaten egg

15. With the left over puff pastry, cut out seasonal shapes and place onto the wellies. Since it wasn’t yet Thanksgiving and certainly not Christmas, we decorated with fall leaves and acorn shapes.

16. Give the decorated wellies one more brush of the egg wash and place in the oven

beef wellingtons

Stuffed, Sealed, Decorated & Oven Ready

17. Bake for :20 -:22 minutes until the pastry is golden brown.  When you remove from the oven, let the wellies rest for at least :08 mins. The meat should be a perfect medium rare

18. Each guest will have his/her own perfect package with a generous pour of sherry cream sauce

individual beef wellingtons

Perfect Package

Life is full of opportunities to improvise. The trick is not to be thrown by them.

Generally, I don’t share meal prep improvisations with my guests. I mean, no one had an allergy, so did they need to know that we used real flour not corn starch to flour the pans in which we prepared a meant to be gluten-free cake? And, when you think about it, improvising with the diet coke can as a rolling pin for a fabulously fattening Paula Deen dish is not only ironic, but may be just a little bit brilliant…